2015年2月27日 星期五

eMotion: Getting Started With Layers And Particles

since: 2015/02/27
update: 2015/02/27
reference:
1. eMotion | Adrien M / Claire B
2. eMotion app > Help > eMotion Help

A. 下載軟體:

     eMotion | Adrien M / Claire B
     > Download eMotion 0.7.1 [Mac OS X 10.8 & 10.9 only]
     > 解壓縮後產生: eMotion.app

-----------------------------------------------------------------------------------------------

B. 新增圖層:
     1. 點擊 eMotion.app 開啟應用程式後, 出現一個全黑的視窗.

     2. Window > Layers: 產生圖層視窗

     3. 點擊 "+ New layer" 產生新的圖層, 並用滑鼠雙擊 Layer 名稱, 更改合適的名稱.

-----------------------------------------------------------------------------------------------
C. 儲存專案檔案與重新載入:
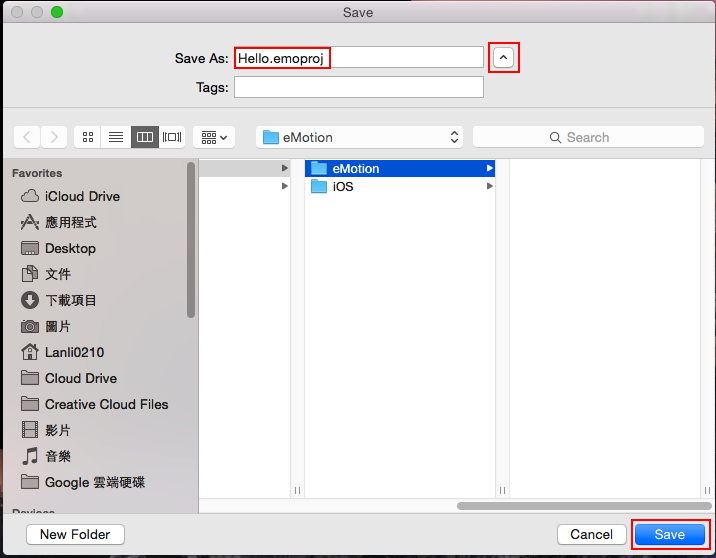
    1. File > Save As...


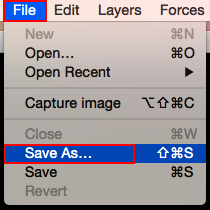
    2. 選擇儲存位置後, 輸入名稱, 按下 "Save"


   4. 離開 eMotion: eMotion > Quit eMotion

   5. 載入專案檔案: 打開 eMoton 後, File > Open...

    > 選擇專案檔案 > Open

    開啟圖層視窗: Window > Layers
                               > 多出了一個 Lights 的圖層, 目前尚未用到, 可以按下 "" 移除.

-----------------------------------------------------------------------------------------------

D. 粒子特效:

1. Tools > Particles

2. Window > Current tool options
    Flow: 流動效果
    Size: 粒子大小 (設成: 3)
    Opacity: 不透明度
    Impulse: 脈衝效果 (設成: 1)

3. 點選 particles 1 圖層, 用滑鼠畫出 "Hello"

4. 點選 particles 2 圖層, 用滑鼠畫出 "eMotion"

5. 點選 particles 1 圖層, 取消勾選 "顯示圖層";
    點選 particles 2 圖層,降低不透明度.

沒有留言:

張貼留言

注意:只有此網誌的成員可以留言。