參考資料:
1. Version Control System with XCode 4 and Git Tutorial | Smart Apps
http://www.smartapps.co/2011/01/version-control-system-with-xcode-4-and-git-tutorial/
2. Help.GitHub - Generating SSH keys (OSX)
http://help.github.com/mac-key-setup/
3. Help.GitHub - Working with SSH key passphrases
http://help.github.com/working-with-key-passphrases/
4. gist: 830465 - gitignore file for Xcode Projects- GitHub
https://gist.github.com/830465
5. Sample .gitignore files for various projects
http://sujee.net/tech/articles/gitignore/
一. 環境:
1. Mac OS X: 10.6.6 Snow Leopard
2. Xcode: 4.0 GM (Golden Master)
3. Git: 1.7.4-x86_64-leopard
二. set up a remote depositor(貯藏所):
A. 在 Github.com 註冊一個賬號: Sign up for GitHub - GitHub
說明: free for public repositories; paid for private repositories.
B. 建立一個新的 remote Repository:
進入 Create a New Repository , 建立一個新的 Repository:
說明: 在此 Project Name 為: git_repository, 會與 四. 所建立的
local repository 同名(可以用產品名稱來命名).

按下 Create Repository 後, 會出現相關步驟的說明, 這邊先參考, 之後就會作到.

備註: 二個超連結
Importing a Subversion Repo? Click here
When you're done: Continue
// https://github.com/your-account/git_repository
Importing a Subversion Repo? Click here
When you're done: Continue
// https://github.com/your-account/git_repository
C. Generating SSH keys on OS X:
1. 打開終端機, 先檢查 ssh key 目錄是否存在:
$ cd ~/.ssh
$ ls
說明: a. 此目錄下, 如果已有存在的 keypair (預設為: id_rsa, id_rsa.pub),
且想要使用的話, 就不必再產生一次.
b. 或者除了移除之前的 keypair 外, 也可以作備份:
$ mkdir key_backup
$ cp id_rsa* key_backup
$ rm -rf id_rsa*
c. ssh 預設會使用 ~/.ssh 目錄下, 名稱為以下的 keys:
id_rsa, id_dsa 或 identity.
2. 產生 RSA keypair:
$ ssh-keygen -t rsa -C "lanli0210@gmail.com"
Generating public/private rsa key pair.
Enter file in which to save the key (/Users/lanli/.ssh/id_rsa):
// 直接按 enter, 使用預設值即可
Enter passphrase (empty for no passphrase): // 輸入 passphrase
Enter same passphrase again: // 再次輸入 passphrase
Your identification has been saved in /Users/lanli/.ssh/id_rsa.
Your public key has been saved in /Users/lanli/.ssh/id_rsa.pub.
The key fingerprint is:
bf:96:7d:8a:16:f7:a7:93:b6:08:23:34:77:c0:b1:fe lanli0210@gmail.com
The key's randomart image is:
+--[ RSA 2048]----+
| . |
| . o |
| + |
| . . |
| S o . |
| . +.o. |
| . +=E. . |
| .+=..* .|
| oo o+o= |
+-----------------+
說明: 1. 這時用 ls 就可以看到二個檔案: id_rsa 與 id_rsa.pub
2. 如果不使用預設的 key names 或要將 keys 存放在別的目錄,
則需要執行: ssh-add path/to/my_key 讓 ssh 知道 keys 在哪裡.
D. Adding the key to your GitHub account:
1. 打開 Browser 進入: git hub account page
2. 先點選左邊 "SSH Public Keys", 再點 "add another public key"
3. 先從終端機 copy public key: id_rsa.pub 的內容到 clipboard(剪貼板):
$ cat ~/.ssh/id_rsa.pub | pbcopy
說明: 如此以確保 key 的內容不會包含換行或空白.
4. 在 Key 的欄位內貼上 public key 的內容: command + v

當作 Title.
6. 接著按下: "Add key" 結果如下, 產生了一個 public key.

$ ssh git@github.com
The authenticity of host 'github.com (207.97.227.239)' can't be established.
RSA key fingerprint is 16:27:ac:a5:76:28:2d:36:63:1b:56:4d:eb:df:a6:48.
Are you sure you want to continue connecting (yes/no)? yes
Warning: Permanently added 'github.com,207.97.227.239' (RSA) to the list of known hosts.
接著, 輸入密碼:

PTY allocation request failed on channel 0
Hi lanli! You've successfully authenticated, but GitHub does not provide shell access. Connection to github.com closed.
說明: 有出現上方的 You've successfully authenticated 就代表成功了.
三. 用 Xcode 4 建立一個 Workspace (選擇性):
A. 特點: 1. 方便組織多個專案.
2. 可以在同一個地方幫多個專案 commit changes.
3. Xcode 4 Workspace 允許在單一個地方儲存: 你所有的
projects, documents, folders, schemes 的 links(連結),
它並沒有控制住實際的資料; 只是一種參照到
projects, folders, various documents 的自由集合.
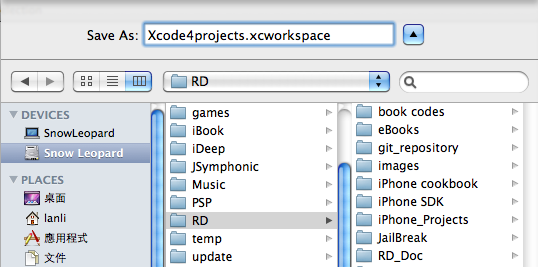
B.步驟: 打開 Xcode 4 > File > New > New Workspace
瀏覽要存放的位置後, 然後給個名稱.
(在此: 路徑為 /Lanli/RD ; 名稱為: Xcode4projects )
四. 建立 Local Repository:
A. 下載並安裝 Git: http://git-scm.com/download
在此採用版本: git-1.7.4-x86_64-leopard
B. 打開終端機, 告訴 Git 你的 user name 跟 email:
$ git config --global user.name "Lanli Chen"
$ git config --global user.email lanli0210@gmail.com
C. 建立一個新的 local repository:
說明: 1. 之後的 projects 也會建在此目錄下.
2. 可將產品名稱當成 repository 的目錄名稱;
此目錄下再建立多個與該產品相關的專案.
$ mkdir /Lanli/RD/git_repository
$ cd /Lanli/RD/git_repository
$ git init
// msg: Initialized empty Git repository in /Lanli/RD/git_repository/.git/
$ touch README
$ git add README
$ git commit -m 'first commit'
[master (root-commit) 3dbca1d] first commit
0 files changed, 0 insertions(+), 0 deletions(-)
create mode 100644 README
說明: 1. 查看 git 的用法 -> git --help
2. git 的 online manual: Git User's Manual
$ cd /Lanli/RD/git_repository
$ touch .gitignore
$ vi .gitignore
加入以下的內容:
存檔並退出.
B. .gitattributes 檔設定
$ cd /Lanli/RD/git_repository
$ touch .gitattributes
$ vi .gitattributes
加入以下的內容:
*.pbxproj -crlf -diff -merge
存檔並退出.
說明: The line in .gitattributes treats your Xcode project file as a binary. This prevents Git from trying to fix newlines, show it in diffs, and excludes it from merges. Note that you will still see it shown as a conflict in merges, although the file won't have changed. Simply commit it and things should be good.
Xcode 4 > File > New > New Project
瀏覽要存放的位置後, 然後給個名稱.
(在此: 路徑為 /Lanli/RD/git_repository ; 名稱為: helloGit )
B. 將此專案加入 repository:
$ cd /Lanli/RD/git_repository
$ git add helloGit
$ git commit -m 'helloGit project added'
[master 0459168] helloGit project added
18 files changed, 1484 insertions(+), 0 deletions(-)
create mode 100644 helloGit/helloGit.xcodeproj/project.pbxproj
create mode 100644 helloGit/helloGit.xcodeproj/xcuserdata/lanli.xcuserdatad/xcschemes/helloGit.xcscheme
......
$ cd /Lanli/RD/git_repository
$ git remote add origin git@github.com:lanli/git_repository.git
// 如果出現訊息: fatal: remote origin already exists.
// 先執行: git remote rm origin ; 然後再重新 add 一次此步驟.
$ git push origin master
Counting objects: 31, done.
Delta compression using up to 2 threads.
Compressing objects: 100% (25/25), done.
Writing objects: 100% (31/31), 11.42 KiB, done.
Total 31 (delta 3), reused 0 (delta 0)
To git@github.com:lanli/git_repository.git
* [new branch] master -> master
B. 接著便可以 refresh account page, 並進入 Public Repositories 內的專案.

C. 點進 git_repository 裡看看:

D. 可再點進 helloGit 裡看看:
可看到所有從 local repository 所 commits 進來的檔案.

Xcode 4 > 右上方 Organizer > 切到 Repositories tab , 會看到 local repository,
圖中有顯示:
Location /Lanli/RD/git_repository
Type Git

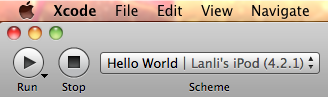
B. 當有修改 source code, 可先執行 local 的 commit:
select modified file (檔名右方會有一個 M 符號 ) > 右鍵 >
Source Control > Commit Select Files.
 C. 同步更新到 remote repository:
$ cd /Lanli/RD/git_repository
$ git push origin master
說明: 更新 remote Repository 的專案後可看到:
name age message
helloGitViewController.h 5 minutes ago add comment test

D. 如果要從 remote repository 取得最新的版本:
$ cd /Lanli/RD/git_repository
$ git pull origin master
在此採用版本: git-1.7.4-x86_64-leopard
B. 打開終端機, 告訴 Git 你的 user name 跟 email:
$ git config --global user.name "Lanli Chen"
$ git config --global user.email lanli0210@gmail.com
C. 建立一個新的 local repository:
說明: 1. 之後的 projects 也會建在此目錄下.
2. 可將產品名稱當成 repository 的目錄名稱;
此目錄下再建立多個與該產品相關的專案.
$ mkdir /Lanli/RD/git_repository
$ cd /Lanli/RD/git_repository
$ git init
// msg: Initialized empty Git repository in /Lanli/RD/git_repository/.git/
$ touch README
$ git add README
$ git commit -m 'first commit'
[master (root-commit) 3dbca1d] first commit
0 files changed, 0 insertions(+), 0 deletions(-)
create mode 100644 README
說明: 1. 查看 git 的用法 -> git --help
2. git 的 online manual: Git User's Manual
五. git 環境設定:
(僅供參考, Xcode 4 的環境已不太相同, 並且個別專案目錄下也要設定)
A. .gitignore 檔設定(僅供參考, Xcode 4 的環境已不太相同, 並且個別專案目錄下也要設定)
$ cd /Lanli/RD/git_repository
$ touch .gitignore
$ vi .gitignore
加入以下的內容:
# Mac OS X Finder and whatnot.DS_Store# Sparkle distribution Private Key (Don't check me in!)dsa_priv.pem# XCode (and ancestors) per-user config (very noisy, and not relevant)*.mode1*.mode1v3*.mode2v3*.perspective*.perspectivev3*.pbxuser# Generated filesVersionX-revision.h# build productsbuild/*.[oa]# Other source repository archive directories (protects when importing).hg.svnCVS# automatic backup files*~.nib*.swp*~*(Autosaved).rtfd/Backup[ ]of[ ]*.pages/Backup[ ]of[ ]*.key/Backup[ ]of[ ]*.numbers/存檔並退出.
B. .gitattributes 檔設定
$ cd /Lanli/RD/git_repository
$ touch .gitattributes
$ vi .gitattributes
加入以下的內容:
*.pbxproj -crlf -diff -merge
存檔並退出.
說明: The line in .gitattributes treats your Xcode project file as a binary. This prevents Git from trying to fix newlines, show it in diffs, and excludes it from merges. Note that you will still see it shown as a conflict in merges, although the file won't have changed. Simply commit it and things should be good.
六. 加入 Projects:
A. 用 Xcode 新增一個(或多個) projects 放在 C. 建立的 local repository 下:Xcode 4 > File > New > New Project
瀏覽要存放的位置後, 然後給個名稱.
(在此: 路徑為 /Lanli/RD/git_repository ; 名稱為: helloGit )
B. 將此專案加入 repository:
$ cd /Lanli/RD/git_repository
$ git add helloGit
$ git commit -m 'helloGit project added'
[master 0459168] helloGit project added
18 files changed, 1484 insertions(+), 0 deletions(-)
create mode 100644 helloGit/helloGit.xcodeproj/project.pbxproj
create mode 100644 helloGit/helloGit.xcodeproj/xcuserdata/lanli.xcuserdatad/xcschemes/helloGit.xcscheme
......
七. 將 project 的 changes push 到 remote Repository:
A. 語法: git remote add origin git@github.com:username/ProjectName$ cd /Lanli/RD/git_repository
$ git remote add origin git@github.com:lanli/git_repository.git
// 如果出現訊息: fatal: remote origin already exists.
// 先執行: git remote rm origin ; 然後再重新 add 一次此步驟.
$ git push origin master
Counting objects: 31, done.
Delta compression using up to 2 threads.
Compressing objects: 100% (25/25), done.
Writing objects: 100% (31/31), 11.42 KiB, done.
Total 31 (delta 3), reused 0 (delta 0)
To git@github.com:lanli/git_repository.git
* [new branch] master -> master
B. 接著便可以 refresh account page, 並進入 Public Repositories 內的專案.

C. 點進 git_repository 裡看看:

可看到所有從 local repository 所 commits 進來的檔案.

八. Xcode 4 的 Remote Repository:
A. 到 Xcode 4 的 Repositories 設定頁籤:Xcode 4 > 右上方 Organizer > 切到 Repositories tab , 會看到 local repository,
圖中有顯示:
Location /Lanli/RD/git_repository
Type Git

select modified file (檔名右方會有一個 M 符號 ) > 右鍵 >
Source Control > Commit Select Files.

$ cd /Lanli/RD/git_repository
$ git push origin master
說明: 更新 remote Repository 的專案後可看到:
name age message
helloGitViewController.h 5 minutes ago add comment test

$ cd /Lanli/RD/git_repository
$ git pull origin master