update: 2013/12/30
reference:
1. Amazon.com: Practical OpenCV eBook
2. Welcome to opencv documentation!
3. I touchs: Using OpenCV on Mac OS X
4. 高斯模糊 - 維基百科
5. 標準差 - 維基百科
A. 前置作業:
1. 先依照 I touchs: Using OpenCV on Mac OS X 的說明, 建置好開發環境.
2. 需要加入到專案的 OpenCV 函式庫爲: (Add Files to Project...)
libopencv_core.dylib
libopencv_highgui.dylib
libopencv_imgproc.dylib
3. 將 main.cpp 的 main function 更名.(不作為程式執行的進入點)
//int main(int argc, const char * argv[])
int main_main(int argc, const char * argv[])
4. 爲專案新增 C++ 檔案:
點選專案 > New File... > OS X > C and C++ > C++ Class > Next >
Save as: GaussianKernelBlur.cpp > Create
----------------------------------------------------------------------------------------
B. 撰寫程式:
1. 開啓 GaussianKernelBlur.h 檔案, 修改如下:
#ifndef __HelloOpenCV__GaussianKernelBlur__
#define __HelloOpenCV__GaussianKernelBlur__
#include <iostream>
//@add
#include <opencv2/opencv.hpp>
#include <opencv2/highgui/highgui.hpp>
#include <opencv2/imgproc/imgproc.hpp>
#endif /* defined(__HelloOpenCV__GaussianKernelBlur__) */
---------------------------------------------------------------------------------
2. 開啓 GaussianKernelBlur.cpp 檔案, 修改如下:
#include "GaussianKernelBlur.h"
using namespace std;
using namespace cv;
Mat image, image_blurred;
const int sliderMax = 21; // slider 最大的數值
int slider = 5;
float sigma; // 常態分佈的標準差
void on_trackbar(int, void*)
{
// kernel size(k_size): 限制為大於零的奇數
int k_size = max(1, slider);
k_size = k_size % 2 == 0 ? k_size + 1 : k_size;
setTrackbarPos("Kernel Size", "Blurred image", k_size);
sigma = 0.3 * ((k_size - 1) * 0.5 - 1) + 0.8;
printf("Gausscian k_size: %d \n", k_size); // kernel size
printf("Gausscian sigma: %f \n", sigma); // 常態分佈的標準差
GaussianBlur(image, image_blurred, Size(k_size, k_size), sigma);
imshow("Blurred image", image_blurred);
}
int main()
{
image = imread("/Lanli/RD/Projects/OpenCV_Mac/HelloOpenCV/pipi2.png");
namedWindow("Original image");
namedWindow("Blurred image");
imshow("Original image", image);
sigma = 0.3 * ((slider - 1) * 0.5 - 1) + 0.8;
printf("Gausscian k_size: %d \n", slider); // kernel size
printf("Gausscian sigma: %f \n", sigma); // 常態分佈的標準差
GaussianBlur(image, image_blurred, Size(slider, slider), sigma);
imshow("Blurred image", image_blurred);
createTrackbar("Kernel Size", "Blurred image", &slider, sliderMax, on_trackbar);
while (char(waitKey(1) != 'q')) {}
return 0;
}
----------------------------------------------------------------------------------------
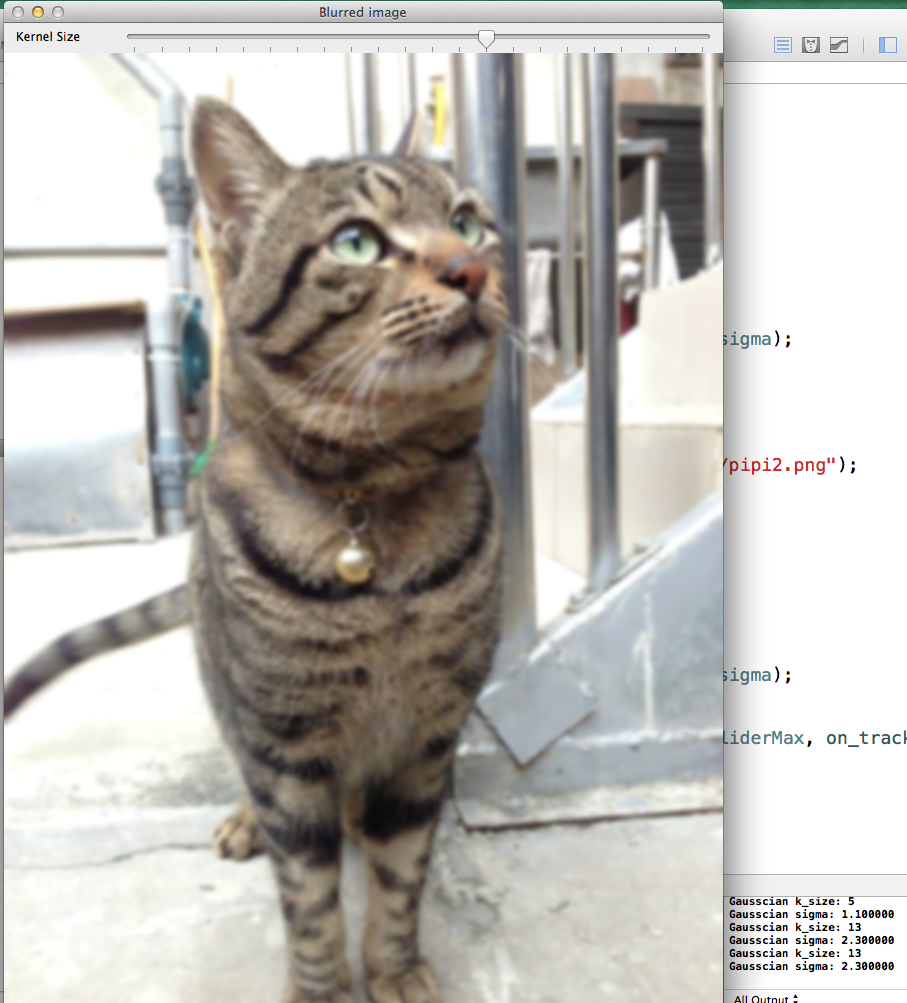
C. 執行結果:
原始圖片:

Gaussian kernel size: 5
sigma(標準差): 1.10

sigma(標準差): 2.30
sigma(標準差): 3.50


