顯示具有 eMotion 標籤的文章。 顯示所有文章

2015年3月14日 星期六

eMotion: Wiimote IR Sensor With OSC

since: 2015/03/14
update: 2015/03/14
reference:
1. eMotion | Adrien M / Claire B
2. Home | OSCulator

A. 藍芽連結 Wiimote:
     1. 開啟 Mac 上的藍芽功能後, 打開 Wiimote 電池蓋, 按下電池下方標示為 sync
         的紅色按鈕.

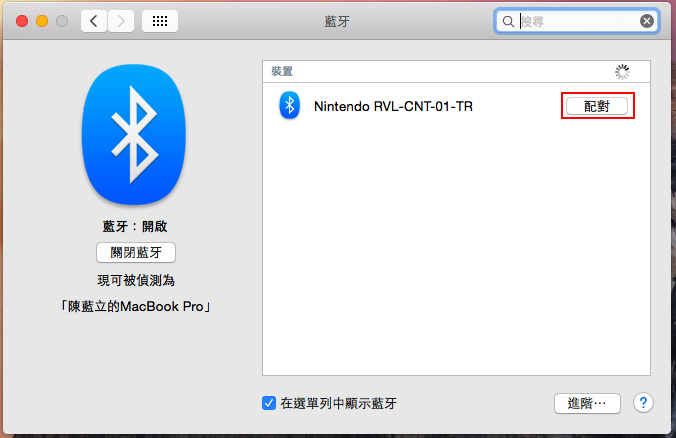
     2. 在 Mac上, 打開藍芽偏好設定:

     3. 對 Wiimote 設備, 點選 "配對"


    4. 配對完成, 顯示: "已連線"

    5. 當在藍芽偏好設定裡, 已經存有該 Wiimote 設備的記錄時, 下次只要按下 Wiimote
        的 "POWER" 即可連線.

-----------------------------------------------------------------------------------------------

B. OSCulator 設定:
     1. 先開啟 eMotion, 以方便之後 OSCulator 的 OSC 設定.

     2. 開啟 OSCulator, 點選 "Wiimote" 圖示, 針對選取的 Wiimote 設備作設定:
          > Outputs 輸出, 只需勾選: Raw IR
          > Smoothing 平滑, 將 IR 設為 0, 代表不作平滑處理

     3. 承上, 點選 "Parameters" > "I/O":
         將 TUIO Input Mode 設為: Raw & Interpreted

     4. 承上, 點選 "OSC Routing":
         > Target 選取 #1, 並設定其 URL 為 Mac 上的 eMotion OSC
         > Routes 按下左下方的 "+", 並設為剛剛 Target 的 #1
         > 都設好後, 按下 "Close".

     5. 分別對 Wiimote 可偵測到的四個 IR 來源設定 EventTypeValue:
         EventType: OSC Routing
         Value: 1 (代表上個步驟設定的 #1)

     6. 切換到 Scalings 頁面:
          View > Flip to Scalings Page

     7. 分別對 Wiimote 可偵測到的四個 IR 來源調整xy輸出的最小最大值.
         在此例為:
          Out. min: -5.0
          Out. max: 5.0

     8. 切回到 Routings 頁面:
         View > Flip to Routings Page

-----------------------------------------------------------------------------------------------

C. eMotion 設定:

     1. Tools > OSC

     2. Window > Current tool options

     3. 分別對收到的四個 IR 訊息設定其 Type 為: Current tool cursors

-----------------------------------------------------------------------------------------------

D.  eMotion 運動筆刷測試:
      1. Forces > drawForces

      2. Tools > Motion brushes

      3. Window > Current tool options

      4. 在 Wiimote IR Sensor 前放置紅外線光源(IR 筆, 打火機, 蠟燭 .... 等),
          即會觸發 Motion brushes 效果.   

2015年3月5日 星期四

eMotion: TUIO

since: 2015/03/05
update: 2015/03/05
reference:
1. eMotion | Adrien M / Claire B
2. eMotion app > Help > eMotion Help
3. TUIO

A. 前置作業:
    1. 執行 eMotion app, 開啟之前儲存的專案檔案.
        File > Open...
       
> select a project file to load.... > Open

    2. 開啟圖層視窗, 顯示選取 "pen" 圖層.
        Window > Layers

    3. 讓筆觸工具正常:
        debug > useFBO (勾選狀態)
        debug > useFBO (取消勾選狀態)

    4. 結果:

-----------------------------------------------------------------------------------------------

B. TUIO
    1. 安裝 TuioPad for iOS.
        開啟後, 按下 "Start"

    2. 回到 eMotion:
        Tools > Tuio
       
      Window > Current tool option

-----------------------------------------------------------------------------------------------

C. 運動筆刷:
    1. Tools > Motion brushes

    2. Window > Current tool options
        Behaviour 選擇 attractor(吸引)

    3. Forces > drawForces

    4. 在 iOS 上即可藉由 TUIO, 在螢幕上觸控來與 eMotion 互動.

    iOS 上的觸控螢幕:

   eMotion 視窗:

eMotion: Motion Brushes

since: 2015/03/04
update: 2015/03/05
reference:
1. eMotion | Adrien M / Claire B
2. eMotion app > Help > eMotion Help

A. 前置作業:
    1. 執行 eMotion app, 開啟之前儲存的專案檔案.
        File > Open...
       
> select a project file to load.... > Open

    2. 開啟圖層視窗, 顯示選取 "particles" 圖層.
        Window > Layers

-----------------------------------------------------------------------------------------------

B. 運動筆刷:
     1. Tools > Motion brushes

     2. Window > Current tool options
          可以選擇不同的 Behaviour(法文: 行為), 調整其屬性參數,
          當再選擇其它行為時, 屬性參數是沿用的, 可視情況再調整.

     3. 目前的行為清單:

參數:
Damping: 減震

簡易說明:
explode: 爆炸
wind: 風吹
displace: 移開
displaceOrigin: 移開原始位置(不恢復原狀)
push: 推
impulse: 脈衝
mountain: 堆積
attractor: 吸引
spring: 彈簧
vortex: 渦流
vortex2: 渦流
flag: 旗號
origin: 原點(無作用?)
shake: 搖動
fall: 落下
freeze: 凍結(畫面)
rotate3D: 3D旋轉(無作用?)
rotateX: 旋轉X軸(無作用?)
rotateY: 旋轉Y軸(無作用?)
rotateZ: 旋轉Z軸(無作用?)
fluid: 流體(無作用?)
fluidMulti: 多方面流體
fluidMovement: 流體運動
fluidDensity: 流體密度(無作用?)
fluidObstacles: 流體障礙(無作用?)
size: 尺寸(無作用?)
opacity: 不透明(無作用?)
duplicate: 複製(無作用?)
magnetic: 磁性
tornado: 龍捲風
follow: 跟隨
pinch: 收縮
earthquake: 地震

4. 例子:
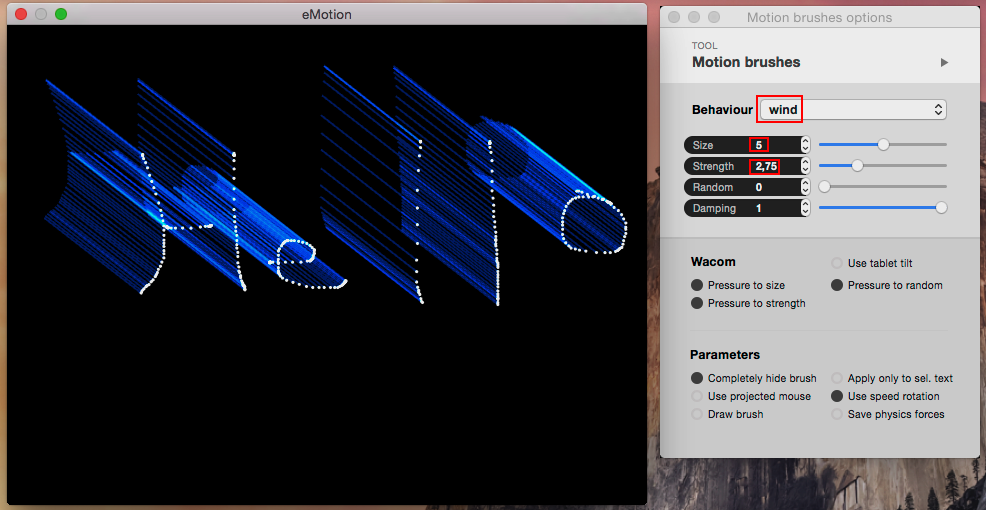
     Forces > drawForces
     Behaviour 選擇 wind (風吹), 調整參數後, 在視窗上從左上往右下劃過.

2015年3月4日 星期三

eMotion: Text

since: 2015/03/04
update: 2015/03/04
reference:
1. eMotion | Adrien M / Claire B
2. eMotion app > Help > eMotion Help

A. 前置作業:
    1. 執行 eMotion app, 開啟之前儲存的專案檔案.
        File > Open...
       
> select a project file to load.... > Open

    2. 開啟圖層視窗, 新增 "text" 圖層, 只顯示選取此圖層.
        Window > Layers

-----------------------------------------------------------------------------------------------

B. 文字效果:
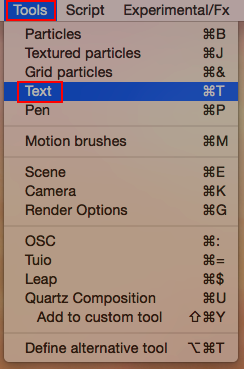
     1. Tools > Text

     2. Window > Current tool options
         建議保留預設值, 如果選擇其他字型, 可能會造成 Text 的 "Item 2" 變成空白, 甚至
         整個程式 crash 掉.

     3. 接著, 便可以在視窗上輸入文字, "Enter" 換行, "空白鍵" 空格等.

-----------------------------------------------------------------------------------------------

C. 施加作用力:
     1. 擺動: Forces > oscillate on
         重力: Forces > gravity on  

     2. 不固定文字:(文字專用)
         Forces > text oscillate off

     3. 效果:

-----------------------------------------------------------------------------------------------

D. 備註:
     1. 目前無法保存專案檔案內容, 應該仍是測試功能.

eMotion: Textured Particles

since: 2015/03/04
update: 2015/03/04
reference:
1. eMotion | Adrien M / Claire B
2. eMotion app > Help > eMotion Help

A. 前置作業:
    1. 執行 eMotion app, 開啟之前儲存的專案檔案.
        File > Open...
       
> select a project file to load.... > Open

    2. 開啟圖層視窗, 新增 "textured particles" 圖層, 只顯示選取此圖層.
        Window > Layers

-----------------------------------------------------------------------------------------------

B. 紋理效果:
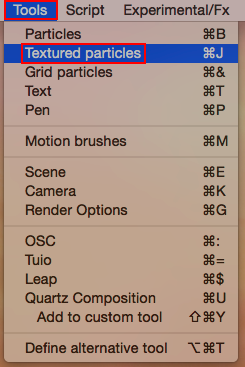
     1. Tools > Textured particles


     2. Window > Current tool options
         Texture 選擇: particule(法文: 粒子) index

     3. 從圖片資料夾拖拉一個圖檔放到 "RELOAC" 裡.

     4. 接著便可在視窗上印出圖像紋理.

    5. 備註: 目前無法保存專案檔案內容, 應該仍是測試功能.

2015年3月3日 星期二

eMotion: Grid Particles

since: 2015/03/03
update: 2015/03/04
reference:
1. eMotion | Adrien M / Claire B
2. eMotion app > Help > eMotion Help

A. 前置作業:
    1. 執行 eMotion app, 開啟之前儲存的專案檔案.
        File > Open...
       
> select a project file to load.... > Open

    2. 開啟圖層視窗, 新增 "grid particles - particle" 與 "grid particles - grid" 圖層,
        並選取 "grid particles - particle" 圖層.

-----------------------------------------------------------------------------------------------

B. 網格粒子效果:

   1. Tools > Grid particles

   2. Window > Current tool options
       調整好參數:
       各為 60 個粒子, 樣式為: Particle
       > 按下 "Create!"

    結果: (看起來怪怪的)

   3. 調整 Particles:
       Tools > Particles

       Window > Current tool options
       > 將 Size 調小一點

    結果:

-----------------------------------------------------------------------------------------------

C. 施加作用力:
    1. 擺動: Forces > oscillate on
        不繫住原點: Forces > anchor origion off

    2. 重力: Forces > gravity on  

-----------------------------------------------------------------------------------------------

D. 網格粒子效果:
    1. 僅顯示選取 "grid particles - grid" 圖層

    2. Window > Current tool options
        調整好參數:
        將 Draw shaded 設為 0
        各為 60 個網格(建議調為螢幕的長寬比), 樣式為: Grid
        > 按下 "Create!"

    結果:

    3. 施加 "擺動" 作用力:
        Forces > oscillate on