update: 2017/02/19
reference:
1. Kinect for Windows SDK v2 基本介紹 | Heresy's Space
2. Kinect for Windows SDK v2 C++ API 簡介 | Heresy's Space
3. K4W v2 C++ Part 1:簡單的深度讀取方法 | Heresy's Space
4. Kinect with Visual Studio 2015 and Windows 10
A. 系統需求:
1. A Kinect for Windows v2 Device (K4W2)
2. 64bit computer with a dedicated USB 3.0
3. Windows 10, 8, 8.1 (64bit)
4. Update your latest video card driver
5. Install DirectX 11
6. Visual Studio Community 2012, 2013, 2015
備註:
a. How to Check Direct X Version in Windows:
(1). Click “Start” > “Run” or hold down the “Windows Key” and press “R“.
(2). Type “dxdiag“, then click “OK“.
(3). The version of DirectX you are currently running will be displayed
on your screen.
b. check your system: run the Kinect Configuration Verifier tool

-----------------------------------------------------------------------------------------------
B. 安裝 Kinect for Windows SDK 2.0
1. 下載 Kinect for Windows SDK 2.0
2. 解壓縮後, 開始安裝


變數: KINECTSDK20_DIR
值: C:\Program Files\Microsoft SDKs\Kinect\v2.0_1409\


> 設定

> 裝置

> 連線的裝置


無法正常執行. (如果有發生的話, 請移除Kinect for Windows SDK 2.0, 再重裝一次)


> 結果:

C. Visual Studio 專案設定(在此以 Visual Studio 2015 為例)
1. 新增專案:
a. 檔案 > 新增 > 專案


2. 新增主程式:
a. 專案 > 加入 > 新增項目


a. 專案 > 屬性


-----------------------------------------------------------------------------------------------
D. 深度讀取
1. 程式碼: DepthReader.cpp
// Standard Library
#include <iostream>
// Kinect for Windows SDK Header
#include <Kinect.h>
int main(int argc, char** argv)
{
// 1a. Get default Sensor
IKinectSensor* pSensor = nullptr;
GetDefaultKinectSensor(&pSensor);
// 1b. Open sensor
pSensor->Open();
// 2a. Get frame source
IDepthFrameSource* pFrameSource = nullptr;
pSensor->get_DepthFrameSource(&pFrameSource);
// 3a. get frame reader
IDepthFrameReader* pFrameReader = nullptr;
pFrameSource->OpenReader(&pFrameReader);
//@add: show Title ############
std::cout << "\n" << "Depth Reader: " << "\n" << std::endl;
// Enter main loop
size_t uFrameCount = 0;
while (uFrameCount < 3)
{
// 4a. Get last frame
IDepthFrame* pFrame = nullptr;
if (pFrameReader->AcquireLatestFrame(&pFrame) == S_OK)
{
// 4b. Get frame description
int iWidth = 0;
int iHeight = 0;
IFrameDescription* pFrameDescription = nullptr;
pFrame->get_FrameDescription(&pFrameDescription);
pFrameDescription->get_Width(&iWidth);
pFrameDescription->get_Height(&iHeight);
pFrameDescription->Release();
pFrameDescription = nullptr;
//@add: show iWidth & iHeight ############
std::cout << "iWidth = " << iWidth << std::endl;
std::cout << "iHeight = " << iHeight << std::endl;
// 4c. Get image buffer
UINT uBufferSize = 0;
UINT16* pBuffer = nullptr;
pFrame->AccessUnderlyingBuffer(&uBufferSize, &pBuffer);
// 4d. Output depth value
int x = iWidth / 2,
y = iHeight / 2;
size_t idx = x + iWidth * y;
//@add: show x, y, idx & uBufferSize ############
std::cout << "x = " << x << std::endl;
std::cout << "y = " << y << std::endl;
std::cout << "idx = " << idx << std::endl;
std::cout << "uBufferSize = " << uBufferSize << std::endl;
std::cout << "pBuffer[idx] = " << pBuffer[idx] << std::endl;
std::cout << "------------------------------------------------" << std::endl;
// 4e. release frame
pFrame->Release();
pFrame = nullptr;
++uFrameCount;
}
//@add: sleep ############
Sleep(10); // 0.01 second
}
// 3b. release frame reader
pFrameReader->Release();
pFrameReader = nullptr;
// 2b. release Frame source
pFrameSource->Release();
pFrameSource = nullptr;
// 1c. Close Sensor
pSensor->Close();
// 1d. Release Sensor
pSensor->Release();
pSensor = nullptr;
//@add: pause ############
//
// Gill Bates:
// system("pause"); it isn't cross platform.
// Use getchar(); to pause program execution.
printf("Press ENTER key to Continue\n");
getchar();
return 0;
}
2. 執行:
> 選擇 x64 模式

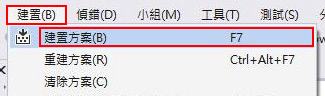
> 建置 > 建置方案
> 結果

