顯示具有 Kinect 標籤的文章。 顯示所有文章

2017年2月19日 星期日

Start Kinect for Windows v2 in C++

since: 2017/02/18
update: 2017/02/19
reference:
1. Kinect for Windows SDK v2 基本介紹 | Heresy's Space
2. Kinect for Windows SDK v2 C++ API 簡介 | Heresy's Space
3. K4W v2 C++ Part 1:簡單的深度讀取方法 | Heresy's Space

4. Kinect with Visual Studio 2015 and Windows 10

A. 系統需求:
     1. A Kinect for Windows v2 Device (K4W2)
     2. 64bit computer with a dedicated USB 3.0
     3. Windows 10, 8, 8.1 (64bit)
     4. Update your latest video card driver
     5. Install DirectX 11

     6. Visual Studio Community 2012, 2013, 2015

     備註:
      a. How to Check Direct X Version in Windows:
      (1). Click “Start” > “Run” or hold down the “Windows Key” and press “R“.
      (2). Type “dxdiag“, then click “OK“.
      (3). The version of DirectX you are currently running will be displayed
             on your screen.

       b.  check your system: run the Kinect Configuration Verifier tool


-----------------------------------------------------------------------------------------------

B. 安裝 Kinect for Windows SDK 2.0

    1. 下載 Kinect for Windows SDK 2.0

    2. 解壓縮後, 開始安裝

    3. 預設安裝路徑為: C:\Program Files\Microsoft SDKs\Kinect\v2.0_1409

    4. 可以檢查環境變數, 已自動新增一個系統變數:
        變數: KINECTSDK20_DIR
        值: C:\Program Files\Microsoft SDKs\Kinect\v2.0_1409\

    5. 接著, 將 Kinect 插上電源並連接到電腦, 從裝置管理員可以看到相關的裝置.

    6. 從工作管理員也可以看到相關的背景程式正在執行

    7. Windows 10 亦可檢查:
        >  設定

      > 裝置

       > 連線的裝置

    8. 測試: 開啟 SDKBrowser

    9. 注意: 不需要再執行 "Kinect Configuration Verifier" 了, 可能會造成之後的程式
        無法正常執行. (如果有發生的話, 請移除Kinect for Windows SDK 2.0, 再重裝一次)


  10. 執行 "Samples: C++" 分類的 Depth Basics-D2D

   > 結果:

-----------------------------------------------------------------------------------------------

C. Visual Studio 專案設定(在此以 Visual Studio 2015 為例)
     1. 新增專案:
         a. 檔案 > 新增 > 專案

         b. Visual C++ > Win32 主控台應用程式 > 確定

         c.下一步 > 勾選: 空專案 > 完成

         d. 結果

     2. 新增主程式:
         a. 專案 > 加入 > 新增項目

         b. Visual C++ > C++ 檔(.cpp) > 名稱: DepthReader.cpp > 新增

     3. 專案屬性設定
         a. 專案 > 屬性

         b. C/C++ > 一般 > 其他 Include 目錄: 加入 $(KINECTSDK20_DIR)\inc

         c. 連結器 > 一般 > 其他程式庫目錄: 加入 $(KINECTSDK20_DIR)\Lib\x64

         d. 連結器 > 輸入 > 其他相依性: 加入 kinect20.lib

-----------------------------------------------------------------------------------------------

D. 深度讀取
     1. 程式碼: DepthReader.cpp
// Standard Library
#include <iostream>

// Kinect for Windows SDK Header
#include <Kinect.h>

int main(int argc, char** argv)
{
    // 1a. Get default Sensor
    IKinectSensor* pSensor = nullptr;
    GetDefaultKinectSensor(&pSensor);

    // 1b. Open sensor
    pSensor->Open();

    // 2a. Get frame source
    IDepthFrameSource* pFrameSource = nullptr;
    pSensor->get_DepthFrameSource(&pFrameSource);

    // 3a. get frame reader
    IDepthFrameReader* pFrameReader = nullptr;
    pFrameSource->OpenReader(&pFrameReader);

    //@add: show Title ############
    std::cout << "\n" << "Depth Reader: " << "\n" << std::endl;

    // Enter main loop
    size_t uFrameCount = 0;
    while (uFrameCount < 3)
    {
        // 4a. Get last frame
        IDepthFrame* pFrame = nullptr;

        if (pFrameReader->AcquireLatestFrame(&pFrame) == S_OK)
        {
            // 4b. Get frame description
            int        iWidth = 0;
            int        iHeight = 0;
            IFrameDescription* pFrameDescription = nullptr;
            pFrame->get_FrameDescription(&pFrameDescription);
            pFrameDescription->get_Width(&iWidth);
            pFrameDescription->get_Height(&iHeight);
            pFrameDescription->Release();
            pFrameDescription = nullptr;
           
            //@add: show iWidth & iHeight ############
            std::cout << "iWidth = " << iWidth << std::endl;
            std::cout << "iHeight = " << iHeight << std::endl;

            // 4c. Get image buffer
            UINT    uBufferSize = 0;
            UINT16*    pBuffer = nullptr;
            pFrame->AccessUnderlyingBuffer(&uBufferSize, &pBuffer);

            // 4d. Output depth value
            int x = iWidth / 2,
                y = iHeight / 2;
            size_t idx = x + iWidth * y;

            //@add: show x, y, idx & uBufferSize ############
            std::cout << "x = " << x << std::endl;
            std::cout << "y = " << y << std::endl;
            std::cout << "idx = " << idx << std::endl;
            std::cout << "uBufferSize = " << uBufferSize << std::endl;

            std::cout << "pBuffer[idx] = " << pBuffer[idx] << std::endl;
            std::cout << "------------------------------------------------" << std::endl;
           
            // 4e. release frame
            pFrame->Release();
            pFrame = nullptr;

            ++uFrameCount;
        }

        //@add: sleep ############
        Sleep(10); // 0.01 second
    }

    // 3b. release frame reader
    pFrameReader->Release();
    pFrameReader = nullptr;

    // 2b. release Frame source
    pFrameSource->Release();
    pFrameSource = nullptr;

    // 1c. Close Sensor
    pSensor->Close();

    // 1d. Release Sensor
    pSensor->Release();
    pSensor = nullptr;

    //@add: pause ############
    //
    // Gill Bates:
    // system("pause"); it isn't cross platform.
    // Use getchar(); to pause program execution.

    printf("Press ENTER key to Continue\n");
    getchar();

    return 0;
}


    2. 執行:
         > 選擇 x64 模式

         > 建置 > 建置方案
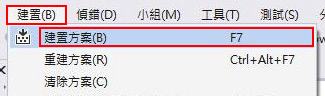

         > 結果

2015年12月23日 星期三

openFrameworks: Kinect For Windows V2

since: 2015/12/23
update: 2015/12/23
reference:
1. Setting up Kinect 2 for OpenFrameworks | rbarraza.com
2. elliotwoods/ofxKinectForWindows2 at 0.8.4


A. 系統需求:
     1. A Kinect for Windows v2 Device (K4W2)
     2. 64bit computer with a dedicated USB 3.0
     3. Windows 10, 8, 8.1
     4. Update your latest video card driver
     5. Install DirectX 11


     備註:
      a. How to Check Direct X Version in Windows:
      (1). Click “Start” > “Run” or hold down the “Windows Key” and press “R“.
      (2). Type “dxdiag“, then click “OK“.
      (3). The version of DirectX you are currently running will be displayed on your screen.

       b.  check your system: run the Kinect Configuration Verifier tool


-----------------------------------------------------------------------------------------------

B. 安裝軟體:
     1. Kinect SDK v2
     2. Visual Studio Express 2012
     3. openframeworks v0.8.4
     4. ofxKinectForWindows2 addon


-----------------------------------------------------------------------------------------------

C. 執行範例專案:
     1. 開啟範例專案
         .... openFrameworks\of_v0.8.4\addons\ofxKinectForWindows2\
         example\example.sln

     2. 設定為啟始專案:

     3. 調整 example 與 ofxKinect4Windows2Lib 專案的 "平台工具組":
         分別對 example 與 ofxKinect4Windows2Lib 專案作以下的調整:

         "點選該專案" > 屬性:
          所有組態 > 一般 > 平台工具組 > Visual Studio 2012 (v110)
  
   example:

   ofxKinect4Windows2Lib: 

     4. 建置方案與除錯:
         a. 建置 > 建置方案
             檢視 > 錯誤清單

         b. 將紅線框內的三行程式碼作註解

     5. 啟動程式:
         建置
> 建置方案 > (啟動)本機 Winows 偵錯工具

-----------------------------------------------------------------------------------------------

D. 建立新的 ofxKinect For Windows2 專案:
     1. 使用 OpenFrameworks  的 Project Generator 來產生新的專案:
         .... openFrameworks\of_v0.8.4\projectGenerator\projectGenerator.exe

     2. 設定專案名稱與要使用的 Addons:
         專案名稱: KinectTest
        
Addons: ofxKinectForWindows2
         > CREATE PROJECT


     2. 開啟剛剛建立的方案:
         .... openFrameworks\of_v0.8.4\apps\myApps\
         KinectTest\KinectTest.sln


     3. 加入 addons 的 ofxKinectForWindows2 專案:
         a. 方案 > 加入 > 現有專案...

         b. 瀏覽選取 ....
             > ....openFrameworks\of_v0.8.4\addons\ofxKinectForWindows2
                \ofxKinectForWindows2Lib\ofxKinectForWindows2Lib.vcxproj


         c. 完成後, 可以看到多出了一個新的專案:
             ofxKinectForWindows2Lib

     4. 幫專案新增 ofxKinectForWindows2.props 屬性工作表:
         a. 檢視 > 屬性管理員

         b. 加入現有屬性工作表


         c. 瀏覽選取屬性工作表:
             .... openFrameworks\of_v0.8.4\addons\
             ofxKinectForWindows2\ofxKinectForWindows2.props


         d. 儲存:

-----------------------------------------------------------------------------------------------

E. 調整專案配置
     KinectTest 專案 > 屬性:

     1. 所有組態 > 組態屬性 > VC++ 目錄 > Include 目錄 >
         加入: $(KINECTSDK20_DIR)\inc

     2. 所有組態 > 組態屬性 > VC++ 目錄 > 程式庫目錄 >
         加入: $(KINECTSDK20_DIR)\lib\x86

     3. 所有組態 > 組態屬性 > 連結器 > 一般 > 其他程式庫目錄 >
         加入: $(KINECTSDK20_DIR)\Lib\x86

     4. 所有組態 > 組態屬性 > 連結器 > 輸入> 其他相依性 >
         加入: $(KINECTSDK20_DIR)\Lib\x86\Kinect20.lib

-----------------------------------------------------------------------------------------------

F. 撰寫程式:
    1. 開啟 ofApp.h 程式, 修改如下:
#pragma once

#include "ofMain.h"
#include "ofxKinectForWindows2.h"

class ofApp : public ofBaseApp{

    public:
        void setup();
        void update();
        void draw();

        void keyPressed(int key);
        void keyReleased(int key);
        void mouseMoved(int x, int y );
        void mouseDragged(int x, int y, int button);
        void mousePressed(int x, int y, int button);
        void mouseReleased(int x, int y, int button);
        void windowResized(int w, int h);
        void dragEvent(ofDragInfo dragInfo);
        void gotMessage(ofMessage msg);

        ofxKFW2::Device kinect;
};


    2. 開啟 ofApp.cpp 程式, 修改如下:
#include "ofApp.h"

//--------------------------------------------------------------
void ofApp::setup(){
    kinect.open();

    kinect.initBodyIndexSource();
    kinect.initColorSource();
}

//--------------------------------------------------------------
void ofApp::update(){
    this->kinect.update();
}

//--------------------------------------------------------------
void ofApp::draw(){
    this->kinect.getBodyIndexSource()->draw(0,0,512,424)

  this->kinect.getColorSource()->draw(532,0,640,360);
}
....

-----------------------------------------------------------------------------------------------

G. 建置與執行: (只取部份畫面)

2015年12月21日 星期一

Processing 3: Kinect for Windows v2

since: 2015/12/21
update: 2015/12/21

reference:
1. ThomasLengeling/KinectPV2

A. 系統需求:
     1. A Kinect for Windows v2 Device (K4W2)
     2. 64bit computer with a dedicated USB 3.0
     3. Windows 10, 8, 8.1
     4. Update your latest video card driver
     5. Install DirectX 11


     備註:
      a. How to Check Direct X Version in Windows:
      (1). Click “Start” > “Run” or hold down the “Windows Key” and press “R“.
      (2). Type “dxdiag“, then click “OK“.
      (3). The version of DirectX you are currently running will be displayed on your screen.

       b.  check your system: run the Kinect Configuration Verifier tool


-----------------------------------------------------------------------------------------------

B. 安裝軟體:
     1. Kinect SDK v2
     2. Processing 3.0

-----------------------------------------------------------------------------------------------

C. 安裝 Kinect v2 for Processing Library

     1. Sketch > Import Library... > Add Library...

     2. find: Kinect v2 for Processing > Install

-----------------------------------------------------------------------------------------------

D. 執行範例程式:
     1. File > Examples... > Contributed Libraries > Kinect v2 for Processing
                > DepthTest > Run

     2. 執行結果: