since: 2011/08/30
update: 2011/12/01
將 Fetched Results Controller 合併到 Table 中.
A. 修改 NoteBookViewController.m 如下:
#pragma mark - Table view data source
- (NSInteger)numberOfSectionsInTableView:(UITableView *)tableView
{
// Return the number of sections.
return [[self.fetchedResultsController sections] count]; // it always return 1;
}
- (NSInteger)tableView:(UITableView *)tableView numberOfRowsInSection:(NSInteger)section
{
// Return the number of rows in the section.
id<NSFetchedResultsSectionInfo> sectionInfo = [[fetchedResultsController sections] objectAtIndex:section];
return [sectionInfo numberOfObjects];
}
- (UITableViewCell *)tableView:(UITableView *)tableView cellForRowAtIndexPath:(NSIndexPath *)indexPath
{
static NSString *CellIdentifier = @"NoteBookCell";
UITableViewCell *cell = [tableView dequeueReusableCellWithIdentifier:CellIdentifier];
if (cell == nil) {
cell = [[[UITableViewCell alloc] initWithStyle:UITableViewCellStyleDefault reuseIdentifier:CellIdentifier] autorelease];
}
// Configure the cell...
// * need to implement the configureCell:atIndexPath: method
[self configureCell:cell atIndexPath:indexPath];
return cell;
}
----------------------------------------------------------------------------------------------------------
B. 在 NoteBookViewController.m 裡, 實作 configureCell:atIndexPath: method
1. 在 @implementation 字串的前一行宣告一個區塊式的 private method:
@interface NoteBookViewController() // 小括號
- (void)configureCell:(UITableViewCell *)cell atIndexPath:(NSIndexPath *)indexPath;
@end
@implementation NoteBookViewController
2. 接著在實作區, 實作此 method:
- (void)configureCell:(UITableViewCell *)cell atIndexPath:(NSIndexPath *)indexPath {
NSManagedObject *noteBook = [self.fetchedResultsController objectAtIndexPath:indexPath];
cell.textLabel.text = [noteBook valueForKey:@"name"];
cell.textLabel.textColor = [UIColor brownColor];
}
----------------------------------------------------------------------------------------------------------
C. 當使用者移動或刪除一列資料 (in this case, we can only delete it)
1. 在 NoteBookViewController.h 新增以下的 method:
- (void)saveContext;
2. 在 NoteBookViewController.m 新增以下的 method:
- (void)saveContext {
NSManagedObjectContext *context = [fetchedResultsController managedObjectContext];
NSError *error = nil;
if (![context save:&error]) {
NSLog(@"Unresolved error %@, %@", error, [error userInfo]);
abort();
}
}
- (void)tableView:(UITableView *)tableView commitEditingStyle:(UITableViewCellEditingStyle)editingStyle forRowAtIndexPath:(NSIndexPath *)indexPath
{
if (editingStyle == UITableViewCellEditingStyleDelete) {
// Delete the managed object for the given index path
NSManagedObjectContext *context = [self.fetchedResultsController managedObjectContext];
[context deleteObject:[self.fetchedResultsController objectAtIndexPath:indexPath]];
// Save the context
[self saveContext];
}
}
----------------------------------------------------------------------------------------------------------
D. 在 Lala_s_Program_NoteAppDelegate.m 中提供 managed object contexts 給
noteBookViewController :
- (BOOL)application:(UIApplication *)application didFinishLaunchingWithOptions:(NSDictionary *)launchOptions
{
NoteBookViewController *noteBookViewController = [[NoteBookViewController alloc] initWithStyle:UITableViewStylePlain];
// set controller's managed object context member right after initializing
noteBookViewController.managedObjectContext = self.managedObjectContext;
....
}
2011年8月30日 星期二
Lala's Program Note 實作記錄: 5. NSFetchedResultsController 之二
since: 2011/08/30
update: 2011/08/30
A. 說明:
1. 之前由於已將 NoteBookViewController 設為 fetchedResultsController 成員變數
的 delegate, 所以必須實作 NSFetchedResultsControllerDelegate 這個 protocol
的 methods.
B. 實作 NSFetchedResultsControllerDelegate protocol 的 methods:
在 NoteBookViewController.m 實作以下的 methods.
#pragma mark -
#pragma mark Fetched results controller delegate
// * tells this controller's table view to start a series of updates
// * it can initiate a sequence of changes through its beginUpdates: method.
- (void)controllerWillChangeContent:(NSFetchedResultsController *)controller {
[self.tableView beginUpdates];
}
// * is called when the changes are done.
- (void)controllerDidChangeContent:(NSFetchedResultsController *)controller {
[self.tableView endUpdates];
}
// only for supports sections (目前沒用到)
// * is called when a section changes(added or deleted)
/*
- (void)controller:(NSFetchedResultsController *)controller didChangeSection:(id<NSFetchedResultsSectionInfo>)sectionInfo atIndex:(NSUInteger)sectionIndex forChangeType:(NSFetchedResultsChangeType)type {
switch (type) {
case NSFetchedResultsChangeInsert:
[self.tableView insertSections:[NSIndexSet indexSetWithIndex:sectionIndex] withRowAnimation:UITableViewRowAnimationFade];
break;
case NSFetchedResultsChangeDelete:
[self.tableView deleteSections:[NSIndexSet indexSetWithIndex:sectionIndex] withRowAnimation:UITableViewRowAnimationFade];
break;
}
}
*/
// * is called when a managed object changes(added, deleted, edited, or moved)
// * 需要再配合之後實作 configureCell:atIndexPath: method
// * configureCell:atIndexPath: method will be responsible for configuring a single table cell,
// and you will reuse this method in the tableView:cellForRowAtIndexPath: method.
- (void)controller:(NSFetchedResultsController *)controller didChangeObject:(id)anObject atIndexPath:(NSIndexPath *)indexPath forChangeType:(NSFetchedResultsChangeType)type newIndexPath:(NSIndexPath *)newIndexPath {
UITableView *tableView = self.tableView;
switch (type) {
// An object has been added (inserted)
case NSFetchedResultsChangeInsert:
[tableView insertRowsAtIndexPaths:[NSArray arrayWithObject:newIndexPath] withRowAnimation:UITableViewRowAnimationFade];
break;
// An object has been deleted
case NSFetchedResultsChangeDelete:
[tableView deleteRowsAtIndexPaths:[NSArray arrayWithObject:indexPath] withRowAnimation:UITableViewRowAnimationFade];
break;
// An object has been updated (edited)
case NSFetchedResultsChangeUpdate:
// need to implement the configureCell:atIndexPath: method
[self configureCell:[tableView cellForRowAtIndexPath:indexPath] atIndexPath:indexPath];
break;
// An object has been moved (not used here)
/*
case NSFetchedResultsChangeMove:
[tableView deleteRowsAtIndexPaths:[NSArray arrayWithObject:indexPath] withRowAnimation:UITableViewRowAnimationFade];
[tableView insertRowsAtIndexPaths:[NSArray arrayWithObject:newIndexPath] withRowAnimation:UITableViewRowAnimationFade];
break;
*/
}
}
2011年8月29日 星期一
Lala's Program Note 實作記錄: 4. NSFetchedResultsController 之一
since: 2011/08/29
update: 2011/08/29
參考書籍:
Pro Core Data for iOS: Data Access and Persistence Engine for iPhone, iPad, and iPod touch
A. 說明:
1. NSFetchedResultsController 是設計用來讓 Core Data 與 Table view 整合的類別.
B. 為瀏覽筆記本(NoteBook) 加上 NSFetchedResultsController:
1. 修改 NoteBookViewController.h 如下:
#import <UIKit/UIKit.h>
#import <CoreData/CoreData.h>
@interface NoteBookViewController : UITableViewController {
@interface NoteBookViewController : UITableViewController <NSFetchedResultsControllerDelegate> {
NSFetchedResultsController *fetchedResultsController;
NSManagedObjectContext *managedObjectContext;
}
@property (nonatomic, retain) NSFetchedResultsController *fetchedResultsController;
@property (nonatomic, retain) NSManagedObjectContext *managedObjectContext;
@end
----------------------------------------------------------------------------------------------------------
2. 修改 NoteBookViewController.m 如下:
@synthesize fetchedResultsController, managedObjectContext;
- (void)dealloc {
[fetchedResultsController release];
[managedObjectContext release];
[super dealloc];
}
----------------------------------------------------------------------------------------------------------
3. 在 NoteBookViewController.m 建立 Fetched Results Controller
// Do it in the accessor for the fetchedResultsController member
#pragma mark -
#pragma mark Fetched results controller
- (NSFetchedResultsController *)fetchedResultsController {
if (fetchedResultsController != nil) {
return fetchedResultsController;
}
// Create the fetch request for the entity
NSFetchRequest *fetchRequest = [[NSFetchRequest alloc] init];
NSEntityDescription *entity = [NSEntityDescription entityForName:@"NoteBook" inManagedObjectContext:self.managedObjectContext];
[fetchRequest setEntity:entity];
// Set the batch size
[fetchRequest setFetchBatchSize:10];
// sort by noteBook name, ascending
// * with Fetched Results Controller, you must have at least one sort descriptor.
NSSortDescriptor *sortDescriptor = [[NSSortDescriptor alloc] initWithKey:@"name" ascending:YES];
NSArray *sortDescriptors = [[NSArray alloc] initWithObjects:sortDescriptor, nil];
[fetchRequest setSortDescriptors:sortDescriptors];
// Create the fetched results controller using the fetch request we just created,
// and with the managed object context member,
// and set this controller to be the delegate
// * we pass nil for the sectionNameKeyPath parameter,
// because we have no sections.
NSFetchedResultsController *aFetchedResultsController = [[NSFetchedResultsController alloc] initWithFetchRequest:fetchRequest managedObjectContext:managedObjectContext sectionNameKeyPath:nil cacheName:@"NoteBook"];
aFetchedResultsController.delegate = self;
self.fetchedResultsController = aFetchedResultsController;
// Clean up
[aFetchedResultsController release];
[fetchRequest release];
[sortDescriptor release];
[sortDescriptors release];
// Fetch the results into the fetched results controller
NSError *error = nil;
if (![[self fetchedResultsController] performFetch:&error]) {
//TODO
NSLog(@"Unresolved error %@, %@", error, [error userInfo]);
abort();
}
return fetchedResultsController;
}
update: 2011/08/29
參考書籍:
Pro Core Data for iOS: Data Access and Persistence Engine for iPhone, iPad, and iPod touch
A. 說明:
1. NSFetchedResultsController 是設計用來讓 Core Data 與 Table view 整合的類別.
B. 為瀏覽筆記本(NoteBook) 加上 NSFetchedResultsController:
1. 修改 NoteBookViewController.h 如下:
#import <UIKit/UIKit.h>
#import <CoreData/CoreData.h>
@interface NoteBookViewController : UITableViewController <NSFetchedResultsControllerDelegate> {
NSFetchedResultsController *fetchedResultsController;
NSManagedObjectContext *managedObjectContext;
}
@property (nonatomic, retain) NSFetchedResultsController *fetchedResultsController;
@property (nonatomic, retain) NSManagedObjectContext *managedObjectContext;
@end
----------------------------------------------------------------------------------------------------------
2. 修改 NoteBookViewController.m 如下:
@synthesize fetchedResultsController, managedObjectContext;
- (void)dealloc {
[fetchedResultsController release];
[managedObjectContext release];
[super dealloc];
}
----------------------------------------------------------------------------------------------------------
3. 在 NoteBookViewController.m 建立 Fetched Results Controller
// Do it in the accessor for the fetchedResultsController member
#pragma mark -
#pragma mark Fetched results controller
- (NSFetchedResultsController *)fetchedResultsController {
if (fetchedResultsController != nil) {
return fetchedResultsController;
}
// Create the fetch request for the entity
NSFetchRequest *fetchRequest = [[NSFetchRequest alloc] init];
NSEntityDescription *entity = [NSEntityDescription entityForName:@"NoteBook" inManagedObjectContext:self.managedObjectContext];
[fetchRequest setEntity:entity];
// Set the batch size
[fetchRequest setFetchBatchSize:10];
// sort by noteBook name, ascending
// * with Fetched Results Controller, you must have at least one sort descriptor.
NSSortDescriptor *sortDescriptor = [[NSSortDescriptor alloc] initWithKey:@"name" ascending:YES];
NSArray *sortDescriptors = [[NSArray alloc] initWithObjects:sortDescriptor, nil];
[fetchRequest setSortDescriptors:sortDescriptors];
// Create the fetched results controller using the fetch request we just created,
// and with the managed object context member,
// and set this controller to be the delegate
// * we pass nil for the sectionNameKeyPath parameter,
// because we have no sections.
NSFetchedResultsController *aFetchedResultsController = [[NSFetchedResultsController alloc] initWithFetchRequest:fetchRequest managedObjectContext:managedObjectContext sectionNameKeyPath:nil cacheName:@"NoteBook"];
aFetchedResultsController.delegate = self;
self.fetchedResultsController = aFetchedResultsController;
// Clean up
[aFetchedResultsController release];
[fetchRequest release];
[sortDescriptor release];
[sortDescriptors release];
// Fetch the results into the fetched results controller
NSError *error = nil;
if (![[self fetchedResultsController] performFetch:&error]) {
//TODO
NSLog(@"Unresolved error %@, %@", error, [error userInfo]);
abort();
}
return fetchedResultsController;
}
2011年8月27日 星期六
Lala's Program Note 實作記錄: 3.建立資料模型
since: 2011/08/27
update: 2011/08/29
A. 說明:
1. Core Data manages an object graph using real object references. It has no need
for a unique autoincrement identifier that can be used as a primary key in the
same sense it would be used in a relational database.
備註: a. 譯: Core Data 使用真實的物件參照來管理物件圖表, 因此不需要像
關聯式資料庫那樣使用自動新增的獨一無二 ID 來當主鍵.
b. Core Data is not a database; it's an object graph persistence framework.
2. All Core Data attributes must have a class type.
ex: Entity: Organization
Attribute: id (with type: Integer 16)
// a. create a primitive int from the hash of the organization object
NSManagedObject *organization = ....;
int orgID = [organization hash];
// b. convert the primitive int into an NSNumber object,
// which can be used in the setValue:forKey: method.
[organization setValue:[NSNumber numberWithInt:orgID] forKey:@"id"];
3. Core Data returns the "many" side of a one-to-many relationship as a set(NSSet).
ex: add some employees to the relationship
NSManagedObject *john = ....;
NSManagedObject *jane = ....;
NSManagedObject *bill = ....;
NSMutableSet *johnsEmployees = [john mutableSetValueForKey:@"employees"];
[johnsEmployees addObject:jane];
[johnsEmployees addObject:bill];
B. 資料模型規劃:
Entity:
NoteBook ----> 筆記本
Attributes:
name (type: string) ----> 筆記本名稱(必要)
subName (type: string) ----> 筆記本副名稱(非必要)
articleCount (type: int 16) ----> 文章數量(必要, 預設值:0)
type (type: int 16) ----> 種類(系統預設的, 使用者新增的), (必要, 預設值:0)
dateCreated (type: Date) ----> 建立日期 (非必要)
dateUpdate (type: Date) ----> 更新日期 (非必要)
status (type: int 16) ----> 筆記本狀態 (正常, 刪除), (必要, 預設值:1)
flag (type: int 16) ----> 備用旗標, (非必要, 預設值:0)
---------------------------------------------------------------------------------------------------------------
Entity:
NoteArticle ----> 筆記文章
Attributes:
title (type: string) ----> 英文標題(或使用者新增的) (必要, indexed)
titleC (type: string) ----> 中文標題 (非必要, indexed)
subTitle (type: string) ----> 副標題 (非必要)
content (type: string) ----> 英文內容(或使用者新增的) (必要)
contentC (type: string) ----> 中文內容 (非必要)
readCount (type: int 16) ----> 文章讀取次數, (必要, 預設值:0)
favorite (type: Boolean) ----> 是否為我的最愛, (必要, 預設值:NO)
type (type: int 16) ----> 文章種類(系統預設的, 使用者新增的), (必要, 預設值:0)
version (type: string) ----> 適用的版本 (非必要)
memo (type: string) ----> 備註攔 (非必要)
dateCreated (type: Date) ----> 建立日期 (非必要)
dateUpdate (type: Date) ----> 更新日期 (非必要)
status (type: int 16) ----> 文章狀態 (正常, 刪除), (必要, 預設值:1)
flag (type: int 16) ----> 備用旗標, (非必要, 預設值:0)
---------------------------------------------------------------------------------------------------------------
Relationship:
from: NoteBook
Name: articles
Destination: NoteArticle
Properties: Optional
Plural: To-Many Relationship (一對多)
Delete Rule: Cascade (瀑布似地)
---------------------------------------------------------------------------------------------------------------
Relationship:
from: NoteArticle
Name: book
Destination: NoteBook
Inverse: articles
Properties: Optional
Delete Rule: Nullify (廢棄)
C. 建立完成:

2011年8月20日 星期六
Core Data 資料(sqlite)的管理工具
since: 2011/08/20
update: 2011/08/20
A. 某個有使用 Core Data 的專案, 包含二個 Entity 如下所示:

B. 使用 free 的 SQLite Database Browser:
1. 下載網址: http://sqlitebrowser.sourceforge.net/
2. 使用方式: 打開 App 後, 直接瀏覽專案內的 xxx.sqlite 檔, 並開啟.
說明: 先參考這篇, 將 Xcode 的 iPhone Simulator 目錄位置
建立 symbolic link, 才瀏覽的到.
3. 開啓後, 如下所示:
Database Structure:

Browse Data:

優點: 可以看到整個 Core Data 所產生的 sqlite 資料庫內容.
缺點: 要管理資料庫中的 Entity, Attributes 與 Relationships 不太方便.
C. 使用 Mac App Store 的 Core Data Editor:
1. 要花費 $39.99 USD: Core Data Editor on the Mac App Store
2. 使用方式:
a. 打開 App 後, File > New

b. 點選中間上方的 Configuration

c. 在 Model 頁籤, 填入以下資料:
Name: 可取與 app 同名.
Model Path: 選到 Xcode 的 iPhone Simulator 目錄下 .... 的 .app 檔.

d. 在 Stroes 頁籤, 填入以下資料:
Name: 名稱
Location: 選到 Xcode 的 iPhone Simulator 目錄下 .... 的 .sqlite 檔.
Type: 選 SQLite

e. 接著: File > Save 儲存後, 即可關閉 Configuration 視窗.


f. 管理界面, 如下所示:
Entity: Artist

Entity: Release

Relationships: Artist ---- (creation) ----> Release
Relationships: Release ---- (creator) ----> Artist
3. 優缺點
優點: Entity, Attributes 與 Relationships 資料的呈現較清楚.
缺點: 費用不少, 沒有批次匯入匯出功能 .
update: 2011/08/20
A. 某個有使用 Core Data 的專案, 包含二個 Entity 如下所示:
1. 下載網址: http://sqlitebrowser.sourceforge.net/
2. 使用方式: 打開 App 後, 直接瀏覽專案內的 xxx.sqlite 檔, 並開啟.
說明: 先參考這篇, 將 Xcode 的 iPhone Simulator 目錄位置
建立 symbolic link, 才瀏覽的到.
3. 開啓後, 如下所示:
Database Structure:

Browse Data:

缺點: 要管理資料庫中的 Entity, Attributes 與 Relationships 不太方便.
C. 使用 Mac App Store 的 Core Data Editor:
1. 要花費 $39.99 USD: Core Data Editor on the Mac App Store
2. 使用方式:
a. 打開 App 後, File > New
Name: 可取與 app 同名.
Model Path: 選到 Xcode 的 iPhone Simulator 目錄下 .... 的 .app 檔.

Name: 名稱
Location: 選到 Xcode 的 iPhone Simulator 目錄下 .... 的 .sqlite 檔.
Type: 選 SQLite


Entity: Artist

Entity: Release

Relationships: Artist ---- (creation) ----> Release


優點: Entity, Attributes 與 Relationships 資料的呈現較清楚.
缺點: 費用不少, 沒有批次匯入匯出功能 .
Create symbolic link for iTunes backup & iPhone Simulator Directory
since: 2011/08/20
update: 2011/08/21
A. 說明: 為 iTunes 備份檔案的目錄與 Xcode 的 iPhone Simulator 目錄,
建立 symbolic link (軟連結, 就像捷徑), 方便平常的使用.
(因為是在個人目錄下, 正常情況 Finder 是無法搜尋到, 也無法進入)
B. 步驟:
1. 打開終端機
2. iTunes:
a. 進入 iTunes 備份檔案的位置:
$ cd /Users/lanli/Library/Application\ Support/MobileSync/
b. 回到根目錄, 查詢 ln 的語法
$ cd /
$ ln
usage: ln [-Ffhinsv] source_file [target_file]
ln [-Ffhinsv] source_file ... target_dir
link source_file target_file
c. 在根目錄建立一個名為 MobileSync 的 symbolic link, 連結到
/Users/lanli/Library/Application Support/MobileSync 目錄內:
$ sudo ln -s /Users/lanli/Library/Application\ Support/MobileSync/ MobileSync
d. 查看新建好的連結:
$ ls -al MobileSync
MobileSync -> /Users/lanli/Library/Application Support/MobileSync/
e. 打開 Finder, 將剛剛在根目錄建好的 MobileSync 資料夾,
拖拉至 Dock 上, 即可方便開啓.

3. Xcode 的 iPhone Simulator 目錄位置:
/Users/lanli/Library/Application Support/iPhone Simulator
說明: a. 可同之前的步驟來建立.(建議可以只建 symbolic link 到 Mac 的根目錄).
b. 在開啓的資料夾, 與 MobileSync 同ㄧ目錄內就可以看到
iPhone Simulator 目錄了.
4. 建好的 MobileSync 與 iPhone Simulator symbolic link 在 Mac 根目錄下的狀況:

update: 2011/08/21
A. 說明: 為 iTunes 備份檔案的目錄與 Xcode 的 iPhone Simulator 目錄,
建立 symbolic link (軟連結, 就像捷徑), 方便平常的使用.
(因為是在個人目錄下, 正常情況 Finder 是無法搜尋到, 也無法進入)
B. 步驟:
1. 打開終端機
2. iTunes:
a. 進入 iTunes 備份檔案的位置:
$ cd /Users/lanli/Library/Application\ Support/MobileSync/
b. 回到根目錄, 查詢 ln 的語法
$ cd /
$ ln
usage: ln [-Ffhinsv] source_file [target_file]
ln [-Ffhinsv] source_file ... target_dir
link source_file target_file
c. 在根目錄建立一個名為 MobileSync 的 symbolic link, 連結到
/Users/lanli/Library/Application Support/MobileSync 目錄內:
$ sudo ln -s /Users/lanli/Library/Application\ Support/MobileSync/ MobileSync
d. 查看新建好的連結:
$ ls -al MobileSync
MobileSync -> /Users/lanli/Library/Application Support/MobileSync/
e. 打開 Finder, 將剛剛在根目錄建好的 MobileSync 資料夾,
拖拉至 Dock 上, 即可方便開啓.

/Users/lanli/Library/Application Support/iPhone Simulator
說明: a. 可同之前的步驟來建立.(建議可以只建 symbolic link 到 Mac 的根目錄).
b. 在開啓的資料夾, 與 MobileSync 同ㄧ目錄內就可以看到
iPhone Simulator 目錄了.
4. 建好的 MobileSync 與 iPhone Simulator symbolic link 在 Mac 根目錄下的狀況:
2011年8月18日 星期四
Lala's Program Note 實作記錄: 2.標籤列架構
since: 2011/08/18
update: 2011/09/16
參考: Creating an iOS 4 iPhone Multiview Application using the Tab Bar (Xcode 4) - Techotopia
A. 專案目錄規劃:
專案目錄 > New Group:
新增 3 個群組資料夾: images、MyClasses、XIB, 並可將相關檔案移至資料夾內.
B. 新增 root controller 程式碼: (改成用 coding 的方式)
1. 在 Lala_s_Program_NoteAppDelegate.h 新增 UITabBarController
(當作 root controller)的相關程式碼:
@property (nonatomic, retain) IBOutlet UITabBarController *tabBarController;
@synthesize tabBarController;
[self.window addSubview:tabBarController.view];
[self.window makeKeyAndVisible];
[_window release];
(由於已改成用 coding 的方式, 因此這段不用做, 僅留參考用)
C. 編輯 MainWindow.xib 檔案: 1. (重要)點選 MainWindow.xib 後, 再點最下方的 right facing arrow (朝右方的箭頭), 以顯示 Placeholder 跟 Objects 的 panel .

2. (重要)從 Object library panel (View -> Utilities -> Object Library) 點選 Tab Bar Controller , 並拖拉至 Objects panel 內的 Window icon 下方, 並將新增加的 Tab Bar Controller Object 左邊的箭頭點開. 接著, 依次選取展開的 View Controller - Item 1 與 View Controller - Item 2, 並按 delete 刪除, 結果如下:

3. 連接接口:
先點選左方 Objects 下的 Lala's Program NoteAppDelegate,
接著點住右上方 Outlets 下的 Tab Bar Controller 拖拉至 UI 上.

D. 製作給 Categories, Buy 與 Info 頁籤使用的圖檔:
說明: 在 Mac App Store 買了一個 icon 的製作軟體:
Icon Maker , 先用 Icon Maker 製作 icon,
後來發現無法將背景設為透明, 因此再用 Photoshop 處理,
(a). PNG 檔
(b). 建議 size: 30 * 30 ~ 40 * 40(pixel)
(c). 不能為彩色的圖片(一般使用灰色)
(d). 透明背景
2. 圖檔內容:
categories-35.png (35 * 35)

categories-35@2x.png (70 * 70)

buy-45.png (45 * 45)

buy-45@2x.png (90 * 90)

info-35.png (35 * 35)

info-35@2x.png (70 * 70)


記得勾選: Copy items into destination group's folder

E. 增加 Categories(筆記本分類) 頁籤:
1. 專案目錄 > New File:

2. iOS > Cocoa Touch > UIViewController subclass > Next

3. Subclass 選擇: UITableViewController,
並勾選(預設): With XIB for user interface > Next

4. Save As: NoteBookViewController.m

5. 開啟 NoteBookViewController.m 檔案, 修改三個 method:
- (NSInteger)numberOfSectionsInTableView:(UITableView *)tableView
{
// Return the number of sections.
//return 0;
return 1;
}
- (NSInteger)tableView:(UITableView *)tableView numberOfRowsInSection:(NSInteger)section
{
// Return the number of rows in the section.
//return 0;
return 1;
}
- (id)initWithStyle:(UITableViewStyle)style
{
self = [super initWithStyle:style];
if (self) {
// Custom initialization
self.title = @"Categories";
}
return self;
}
6. 開啟 Lala_s_Program_NoteAppDelegate.m 檔案, 修改如下:
a. import NoteBookViewController.h
#import "NoteBookViewController.h"
b. 修改: application: didFinishLaunchingWithOptions: 方法如下:
- (BOOL)application:(UIApplication *)application didFinishLaunchingWithOptions:(NSDictionary *)launchOptions
{
// Override point for customization after application launch.
tabBarController = [[UITabBarController alloc] init];
/* Detect retina screen */
BOOL hasHighResScreen = NO;
if ([UIScreen instancesRespondToSelector:@selector(scale)]) {
CGFloat scale = [[UIScreen mainScreen] scale];
if (scale > 1.0) {
hasHighResScreen = YES;
}
}
/* ImageName */
NSString *categoriesImageName = nil;
NSString *purchaseImageName = nil;
NSString *infoImageName = nil;
if (hasHighResScreen) {
categoriesImageName = @"categories-35@2x";
purchaseImageName = @"buy-45@2x";
infoImageName = @"info-35@2x";
}
else {
categoriesImageName = @"categories-35";
purchaseImageName = @"buy-45";
infoImageName = @"info-35";
}
/* A. for NoteBookViewController */
// 1. Create a instance of NoteBookViewController
NoteBookViewController *noteBookViewController = [[NoteBookViewController alloc] initWithStyle:UITableViewStylePlain];
// 2. Create a instance of UITabBarItem
UITabBarItem *noteBookItem = [[UITabBarItem alloc] initWithTitle:@"Categories" image:[UIImage imageNamed:categoriesImageName] tag:0];
noteBookViewController.tabBarItem = noteBookItem;
categoriesImageName = nil;
[noteBookItem release];
// 3. Wrap it in an instance of UINavigationController
UINavigationController *navNoteController = [[[UINavigationController alloc] initWithRootViewController:noteBookViewController] autorelease];
// 4. Release it
[noteBookViewController release];
// 5. Add it to the tab abr controller
[tabBarController setViewControllers:[NSArray arrayWithObjects:navNoteController, nil]];
[self.window addSubview:tabBarController.view];
[self.window makeKeyAndVisible];
return YES;
}
7. 結果如下:

F. 增加 Favorite(我的最愛 ) 頁籤:
1. 同 E. 1 ~ 4 之步驟, 檔名取為: FavoriteViewController.m
2. 開啟 FavoriteViewController.m 檔案, 修改三個 method:
- (NSInteger)numberOfSectionsInTableView:(UITableView *)tableView
{
// Return the number of sections.
//return 0;
return 1;
}
- (NSInteger)tableView:(UITableView *)tableView numberOfRowsInSection:(NSInteger)section
{
// Return the number of rows in the section.
//return 0;
return 1;
}
- (id)initWithStyle:(UITableViewStyle)style
{
self = [super initWithStyle:style];
if (self) {
// Custom initialization
self.title = @"Favorite";
}
return self;
}
3. 開啟 Lala_s_Program_NoteAppDelegate.m 檔案, 修改如下:
a. import FavoriteViewController.h
#import "FavoriteViewController.h"
b. 修改: application: didFinishLaunchingWithOptions: 方法如下:
- (BOOL)application:(UIApplication *)application didFinishLaunchingWithOptions:(NSDictionary *)launchOptions
{
// Override point for customization after application launch.
/*B. for FavoriteViewController */
// 1. Create a instance of NoteBookViewController
FavoriteViewController *favoriteViewController = [[FavoriteViewController alloc] initWithStyle:UITableViewStylePlain];
// 2. Create a instance of UITabBarItem
UITabBarItem *favoriteItem = [[UITabBarItem alloc] initWithTabBarSystemItem:UITabBarSystemItemFavorites tag:1];
favoriteViewController.tabBarItem = favoriteItem;
[favoriteItem release];
// 3. Wrap it in an instance of UINavigationController
UINavigationController *navFavoriteController = [[[UINavigationController alloc] initWithRootViewController:favoriteViewController] autorelease];
// 4. Release it
[favoriteViewController release];
// 5. Add it to the tab abr controller
[tabBarController setViewControllers:[NSArray arrayWithObjects:navNoteController, navFavoriteController, nil]];
[self.window addSubview:tabBarController.view];
[self.window makeKeyAndVisible];
return YES;
}
4. 結果如下:

G. 增加 Search(搜尋) 頁籤:
1. 同 E. 1 ~ 4 之步驟(Subclass 選擇: UIViewController),
檔名取為: SearchViewController.m
2. 開啟 SearchViewController.m 檔案, 修改如下:
- (id)initWithNibName:(NSString *)nibNameOrNil bundle:(NSBundle *)nibBundleOrNil
{
self = [super initWithNibName:nibNameOrNil bundle:nibBundleOrNil];
if (self) {
// Custom initialization
//@add
self.title = @"Search";
}
return self;
}
3. 開啟 Lala_s_Program_NoteAppDelegate.m 檔案, 修改如下:
a. import SearchViewController.h
#import "SearchViewController.h"
b. 修改: application: didFinishLaunchingWithOptions: 方法如下:
- (BOOL)application:(UIApplication *)application didFinishLaunchingWithOptions:(NSDictionary *)launchOptions
{
// Override point for customization after application launch.
/* C. for SearchViewController */
// 1. Create a instance of SearchViewController
SearchViewController *searchViewController = [[SearchViewController alloc] init];
// 2. Create a instance of UITabBarItem
UITabBarItem *searchItem = [[UITabBarItem alloc] initWithTabBarSystemItem:UITabBarSystemItemSearch tag:2];
searchViewController.tabBarItem = searchItem;
[searchItem release];
// 3. Wrap it in an instance of UINavigationController
UINavigationController *navSearchController = [[[UINavigationController alloc] initWithRootViewController:searchViewController] autorelease];
// 4. Release it
[searchViewController release];
// 5. Add it to the tab abr controller
[tabBarController setViewControllers:[NSArray arrayWithObjects:navNoteController, navFavoriteController, navSearchController, nil]];
....
[self.window addSubview:tabBarController.view];
[self.window makeKeyAndVisible];
return YES;
}
4. 結果如下:
H. 增加 Purchase(購買) 頁籤:
1. 同 E. 1 ~ 4 之步驟, 其中 Subclass 選擇: UIViewController, 檔名取為: PurchaseViewController.m
2. 開啟 Lala_s_Program_NoteAppDelegate.m 檔案, 修改如下:
a. import PurchaseViewController.h
#import "PurchaseViewController.h"
b. 修改: application: didFinishLaunchingWithOptions: 方法如下:
- (BOOL)application:(UIApplication *)application didFinishLaunchingWithOptions:(NSDictionary *)launchOptions
{
// Override point for customization after application launch.
/* D. for PurchaseViewController */
// 1. Create a instance of PurchaseViewController
PurchaseViewController *purchaseViewController = [[PurchaseViewController alloc] init];
// 2. Create a instance of UITabBarItem
UITabBarItem *purchaseItem = [[UITabBarItem alloc] initWithTitle:@"Buy" image:[UIImage imageNamed:purchaseImageName] tag:3];
purchaseViewController.tabBarItem = purchaseItem;
purchaseImageName = nil;
[purchaseItem release];
// 3. Add it to the tab abr controller
[tabBarController setViewControllers:[NSArray arrayWithObjects:navNoteController, navFavoriteController, navSearchController, purchaseViewController, nil]];
// 4. Release it
[purchaseViewController release];
[self.window addSubview:tabBarController.view];
[self.window makeKeyAndVisible];
return YES;
}
4. 結果如下:

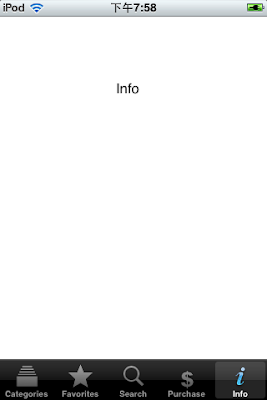
I. 增加 Info(資訊) 頁籤:
1. 同 E. 1 ~ 4 之步驟, 其中 Subclass 選擇: UIViewController, 檔名取為: InfoViewController.m
2. 開啟 Lala_s_Program_NoteAppDelegate.m 檔案, 修改如下:
a. import InfoViewController.h
#import "InfoViewController.h"
b. 修改: application: didFinishLaunchingWithOptions: 方法如下:
- (BOOL)application:(UIApplication *)application didFinishLaunchingWithOptions:(NSDictionary *)launchOptions
{
// Override point for customization after application launch.
/* E. for InfoViewController */
// 1. Create a instance of InfoViewController
InfoViewController *infoViewController = [[InfoViewController alloc] init];
// 2. Create a instance of UITabBarItem
UITabBarItem *infoItem = [[UITabBarItem alloc] initWithTitle:@"Info" image:[UIImage imageNamed:infoImageName] tag:4];
infoViewController.tabBarItem = infoItem;
infoImageName = nil;
[infoItem release];
// 3. Add it to the tab abr controller
[tabBarController setViewControllers:[NSArray arrayWithObjects:navNoteController, navFavoriteController, navSearchController, purchaseViewController, infoViewController, nil]];
// 4. Release it
[infoViewController release];
[self.window addSubview:tabBarController.view]; //@add
[self.window makeKeyAndVisible];
return YES;
}
4. 結果如下:
=================================================================
使用 Interface Builder 的相關參考: (在這邊未使用到)
1. 修改 Tab Bar Item 屬性.
a. 屬性欄位說明:
(a). Badge (標記):可放置紅色圖示來顯示數目.
(b). Identifier:
- 選擇標準項目(Favorites, Search ....), 自動設定好Title 與 Image 欄位值.
- Custom: 可自定 Title 與 Image 欄位.
(c). Title: Tab Bar Item 的文字標題.
(d). Image: Tab Bar Item 的圖檔.
b. 在這裡, 除了 Favorites 與 Search 使用標準項目, 其餘的
Categories, Buy 與 Info 皆採用 Custom 的方式, 因此要自行提供圖檔.
b. Layout: Wants Full Screen(全螢幕), 不需勾選
c. NIB Name: 指定 NIB Name (不需加上 .xib 副檔名)
d. Resize View From NIB: 縮放 View (保留此設定)

update: 2011/09/16
參考: Creating an iOS 4 iPhone Multiview Application using the Tab Bar (Xcode 4) - Techotopia
A. 專案目錄規劃:
專案目錄 > New Group:
新增 3 個群組資料夾: images、MyClasses、XIB, 並可將相關檔案移至資料夾內.
B. 新增 root controller 程式碼: (改成用 coding 的方式)
1. 在 Lala_s_Program_NoteAppDelegate.h 新增 UITabBarController
(當作 root controller)的相關程式碼:
@interface Lala_s_Program_NoteAppDelegate : NSObject
{
UIWindow *window;
{
UIWindow *window;
UITabBarController *tabBarController;
} @property (nonatomic, retain) IBOutlet UIWindow *window;
2. 在 Lala_s_Program_NoteAppDelegate.h 新增相關程式碼:
@synthesize window = _window;
- (BOOL)application:(UIApplication *)application didFinishLaunchingWithOptions:(NSDictionary *)launchOptions
{
// Override point for customization after application launch.
// Override point for customization after application launch.
tabBarController = [[UITabBarController alloc] init];
[self.window makeKeyAndVisible];
return YES;
}
- (void)dealloc
{
[tabBarController release]; [_window release];
[__managedObjectContext release];
[__managedObjectModel release];
[__persistentStoreCoordinator release];
[super dealloc];
}
(由於已改成用 coding 的方式, 因此這段不用做, 僅留參考用)

先點選左方 Objects 下的 Lala's Program NoteAppDelegate,
接著點住右上方 Outlets 下的 Tab Bar Controller 拖拉至 UI 上.

說明: 在 Mac App Store 買了一個 icon 的製作軟體:
Icon Maker , 先用 Icon Maker 製作 icon,
後來發現無法將背景設為透明, 因此再用 Photoshop 處理,
並輸出成適當的 size.
1. 圖檔規格: (a). PNG 檔
(b). 建議 size: 30 * 30 ~ 40 * 40(pixel)
(c). 不能為彩色的圖片(一般使用灰色)
(d). 透明背景
categories-35.png (35 * 35)
buy-45@2x.png (90 * 90)
info-35.png (35 * 35)
3. 加入圖檔到 images 群組.

記得勾選: Copy items into destination group's folder

1. 專案目錄 > New File:


並勾選(預設): With XIB for user interface > Next


- (NSInteger)numberOfSectionsInTableView:(UITableView *)tableView
{
// Return the number of sections.
//return 0;
return 1;
}
- (NSInteger)tableView:(UITableView *)tableView numberOfRowsInSection:(NSInteger)section
{
// Return the number of rows in the section.
//return 0;
return 1;
}
- (id)initWithStyle:(UITableViewStyle)style
{
self = [super initWithStyle:style];
if (self) {
// Custom initialization
self.title = @"Categories";
}
return self;
}
6. 開啟 Lala_s_Program_NoteAppDelegate.m 檔案, 修改如下:
a. import NoteBookViewController.h
#import "NoteBookViewController.h"
b. 修改: application: didFinishLaunchingWithOptions: 方法如下:
- (BOOL)application:(UIApplication *)application didFinishLaunchingWithOptions:(NSDictionary *)launchOptions
{
// Override point for customization after application launch.
tabBarController = [[UITabBarController alloc] init];
/* Detect retina screen */
BOOL hasHighResScreen = NO;
if ([UIScreen instancesRespondToSelector:@selector(scale)]) {
CGFloat scale = [[UIScreen mainScreen] scale];
if (scale > 1.0) {
hasHighResScreen = YES;
}
}
/* ImageName */
NSString *categoriesImageName = nil;
NSString *purchaseImageName = nil;
NSString *infoImageName = nil;
if (hasHighResScreen) {
categoriesImageName = @"categories-35@2x";
purchaseImageName = @"buy-45@2x";
infoImageName = @"info-35@2x";
}
else {
categoriesImageName = @"categories-35";
purchaseImageName = @"buy-45";
infoImageName = @"info-35";
}
/* A. for NoteBookViewController */
// 1. Create a instance of NoteBookViewController
NoteBookViewController *noteBookViewController = [[NoteBookViewController alloc] initWithStyle:UITableViewStylePlain];
// 2. Create a instance of UITabBarItem
UITabBarItem *noteBookItem = [[UITabBarItem alloc] initWithTitle:@"Categories" image:[UIImage imageNamed:categoriesImageName] tag:0];
noteBookViewController.tabBarItem = noteBookItem;
categoriesImageName = nil;
[noteBookItem release];
// 3. Wrap it in an instance of UINavigationController
UINavigationController *navNoteController = [[[UINavigationController alloc] initWithRootViewController:noteBookViewController] autorelease];
// 4. Release it
[noteBookViewController release];
// 5. Add it to the tab abr controller
[tabBarController setViewControllers:[NSArray arrayWithObjects:navNoteController, nil]];
[self.window addSubview:tabBarController.view];
[self.window makeKeyAndVisible];
return YES;
}
7. 結果如下:

1. 同 E. 1 ~ 4 之步驟, 檔名取為: FavoriteViewController.m
2. 開啟 FavoriteViewController.m 檔案, 修改三個 method:
- (NSInteger)numberOfSectionsInTableView:(UITableView *)tableView
{
// Return the number of sections.
//return 0;
return 1;
}
- (NSInteger)tableView:(UITableView *)tableView numberOfRowsInSection:(NSInteger)section
{
// Return the number of rows in the section.
//return 0;
return 1;
}
- (id)initWithStyle:(UITableViewStyle)style
{
self = [super initWithStyle:style];
if (self) {
// Custom initialization
self.title = @"Favorite";
}
return self;
}
3. 開啟 Lala_s_Program_NoteAppDelegate.m 檔案, 修改如下:
a. import FavoriteViewController.h
#import "FavoriteViewController.h"
b. 修改: application: didFinishLaunchingWithOptions: 方法如下:
- (BOOL)application:(UIApplication *)application didFinishLaunchingWithOptions:(NSDictionary *)launchOptions
{
// Override point for customization after application launch.
/*B. for FavoriteViewController */
// 1. Create a instance of NoteBookViewController
FavoriteViewController *favoriteViewController = [[FavoriteViewController alloc] initWithStyle:UITableViewStylePlain];
// 2. Create a instance of UITabBarItem
UITabBarItem *favoriteItem = [[UITabBarItem alloc] initWithTabBarSystemItem:UITabBarSystemItemFavorites tag:1];
favoriteViewController.tabBarItem = favoriteItem;
[favoriteItem release];
// 3. Wrap it in an instance of UINavigationController
UINavigationController *navFavoriteController = [[[UINavigationController alloc] initWithRootViewController:favoriteViewController] autorelease];
// 4. Release it
[favoriteViewController release];
// 5. Add it to the tab abr controller
[tabBarController setViewControllers:[NSArray arrayWithObjects:navNoteController, navFavoriteController, nil]];
[self.window addSubview:tabBarController.view];
[self.window makeKeyAndVisible];
return YES;
}
4. 結果如下:

1. 同 E. 1 ~ 4 之步驟(Subclass 選擇: UIViewController),
檔名取為: SearchViewController.m
2. 開啟 SearchViewController.m 檔案, 修改如下:
- (id)initWithNibName:(NSString *)nibNameOrNil bundle:(NSBundle *)nibBundleOrNil
{
self = [super initWithNibName:nibNameOrNil bundle:nibBundleOrNil];
if (self) {
// Custom initialization
//@add
self.title = @"Search";
}
return self;
}
3. 開啟 Lala_s_Program_NoteAppDelegate.m 檔案, 修改如下:
a. import SearchViewController.h
#import "SearchViewController.h"
b. 修改: application: didFinishLaunchingWithOptions: 方法如下:
- (BOOL)application:(UIApplication *)application didFinishLaunchingWithOptions:(NSDictionary *)launchOptions
{
// Override point for customization after application launch.
/* C. for SearchViewController */
// 1. Create a instance of SearchViewController
SearchViewController *searchViewController = [[SearchViewController alloc] init];
// 2. Create a instance of UITabBarItem
UITabBarItem *searchItem = [[UITabBarItem alloc] initWithTabBarSystemItem:UITabBarSystemItemSearch tag:2];
searchViewController.tabBarItem = searchItem;
[searchItem release];
// 3. Wrap it in an instance of UINavigationController
UINavigationController *navSearchController = [[[UINavigationController alloc] initWithRootViewController:searchViewController] autorelease];
// 4. Release it
[searchViewController release];
// 5. Add it to the tab abr controller
[tabBarController setViewControllers:[NSArray arrayWithObjects:navNoteController, navFavoriteController, navSearchController, nil]];
....
[self.window addSubview:tabBarController.view];
[self.window makeKeyAndVisible];
return YES;
}
4. 結果如下:
H. 增加 Purchase(購買) 頁籤:

1. 同 E. 1 ~ 4 之步驟, 其中 Subclass 選擇: UIViewController, 檔名取為: PurchaseViewController.m
2. 開啟 Lala_s_Program_NoteAppDelegate.m 檔案, 修改如下:
a. import PurchaseViewController.h
#import "PurchaseViewController.h"
b. 修改: application: didFinishLaunchingWithOptions: 方法如下:
- (BOOL)application:(UIApplication *)application didFinishLaunchingWithOptions:(NSDictionary *)launchOptions
{
// Override point for customization after application launch.
/* D. for PurchaseViewController */
// 1. Create a instance of PurchaseViewController
PurchaseViewController *purchaseViewController = [[PurchaseViewController alloc] init];
// 2. Create a instance of UITabBarItem
UITabBarItem *purchaseItem = [[UITabBarItem alloc] initWithTitle:@"Buy" image:[UIImage imageNamed:purchaseImageName] tag:3];
purchaseViewController.tabBarItem = purchaseItem;
purchaseImageName = nil;
[purchaseItem release];
// 3. Add it to the tab abr controller
[tabBarController setViewControllers:[NSArray arrayWithObjects:navNoteController, navFavoriteController, navSearchController, purchaseViewController, nil]];
// 4. Release it
[purchaseViewController release];
[self.window addSubview:tabBarController.view];
[self.window makeKeyAndVisible];
return YES;
}
4. 結果如下:

1. 同 E. 1 ~ 4 之步驟, 其中 Subclass 選擇: UIViewController, 檔名取為: InfoViewController.m
2. 開啟 Lala_s_Program_NoteAppDelegate.m 檔案, 修改如下:
a. import InfoViewController.h
#import "InfoViewController.h"
b. 修改: application: didFinishLaunchingWithOptions: 方法如下:
- (BOOL)application:(UIApplication *)application didFinishLaunchingWithOptions:(NSDictionary *)launchOptions
{
// Override point for customization after application launch.
/* E. for InfoViewController */
// 1. Create a instance of InfoViewController
InfoViewController *infoViewController = [[InfoViewController alloc] init];
// 2. Create a instance of UITabBarItem
UITabBarItem *infoItem = [[UITabBarItem alloc] initWithTitle:@"Info" image:[UIImage imageNamed:infoImageName] tag:4];
infoViewController.tabBarItem = infoItem;
infoImageName = nil;
[infoItem release];
// 3. Add it to the tab abr controller
[tabBarController setViewControllers:[NSArray arrayWithObjects:navNoteController, navFavoriteController, navSearchController, purchaseViewController, infoViewController, nil]];
// 4. Release it
[infoViewController release];
[self.window addSubview:tabBarController.view]; //@add
[self.window makeKeyAndVisible];
return YES;
}
4. 結果如下:

使用 Interface Builder 的相關參考: (在這邊未使用到)
1. 修改 Tab Bar Item 屬性.
a. 屬性欄位說明:
(a). Badge (標記):可放置紅色圖示來顯示數目.
(b). Identifier:
- 選擇標準項目(Favorites, Search ....), 自動設定好Title 與 Image 欄位值.
- Custom: 可自定 Title 與 Image 欄位.
(c). Title: Tab Bar Item 的文字標題.
(d). Image: Tab Bar Item 的圖檔.
b. 在這裡, 除了 Favorites 與 Search 使用標準項目, 其餘的
Categories, Buy 與 Info 皆採用 Custom 的方式, 因此要自行提供圖檔.
2. 設定每個 Tab Bar 的 View Controller 屬性.
a. Title: 留白(Tab Bar Controller 不會用到) b. Layout: Wants Full Screen(全螢幕), 不需勾選
c. NIB Name: 指定 NIB Name (不需加上 .xib 副檔名)
d. Resize View From NIB: 縮放 View (保留此設定)

訂閱:
文章 (Atom)