2011年2月8日 星期二

Xcode 4 Developing for a Jailbroken iOS Device


更新日期: 2011/03/11
適用範圍: Xcode 4 (只需更改相對應的 iOS 版本目錄位置)
參考資料:
1. Developing for a Jailbroken iPhone A to Z (iOS 4.0.1) « alexwhittemore.com
   http://www.alexwhittemore.com/?p=398

2. Xcode 3.2.1 假認證,將自己的Apps放上iphone運行

   http://xspace.uwantx.com/space.php?uid=1&do=blog&id=264


一. 環境:
1. Device: iPod touch 3rd generation (Jailbroken)
2. iOS: 4.2.1
3. Mac OS X: 10.6.6 Snow Leopard
4. Xcode: Xcode 4 and iOS SDK 4.3 Final 


二. 步驟:
1. 在 Mac OS X 上, 開起終端機(Terminal), 執行以下的輸入﹕

   (1). 進入對應的 iOS 版本位置:
        cd /Developer/Platforms/iPhoneOS.platform/Developer/SDKs/iPhoneOS4.3.sdk/

   (2). 備份屬性設定檔; 會要求輸入密碼:
        sudo cp SDKSettings.plist SDKSettings.plist.backup

   (3). 使用 vi 來編輯:
        sudo vi SDKSettings.plist                        

2. 承上, 找到:

CODE_SIGNING_REQUIRED
YES

…. 與 ....

ENTITLEMENTS_REQUIRED
YES
=> 將 YES 改成 NO 後, 儲存後離開 (按 esc 後輸入 :wq ). // :wq => write & quit

3. 承上, 然後輸入﹕
   (1). cd /Developer/Platforms/iPhoneOS.platform/
   (2). sudo cp Info.plist Info.plist.backup
   (3). sudo vi Info.plist
       => 找到所有的 XCiPhoneOSCodeSignContext(有 3個),
            並將其改成 XCCodeSignContext

4. 承上, 然後輸入﹕
   (1). cd ~/Desktop
   (2). vi script (輸入 i 鍵,進入文本修改狀態)
   (3). 將下面的內容複製到終端中 (Terminal)

#!/bin/bash
cd /Developer/Platforms/iPhoneOS.platform/Developer/Library/Xcode/Plug-ins/iPhoneOS\ Build\ System\ Support.xcplugin/Contents/MacOS/
dd if=iPhoneOS\ Build\ System\ Support of=working bs=500 count=255
printf “\xc3\x26\x00\x00〃 >> working
dd if=iPhoneOS\ Build\ System\ Support of=working bs=1 skip=127504 seek=127504
/bin/mv -n iPhoneOS\ Build\ System\ Support iPhoneOS\ Build\ System\ Support.original
/bin/mv working iPhoneOS\ Build\ System\ Support
chmod a+x iPhoneOS\ Build\ System\ Support

   (4). 儲存後離開 (按 esc 後輸入 :wq ).
   (5). 調整權限: chmod 777 script

   (6). 執行 ./script, 可看到類似以下的輸出: (如果沒有的話可以嘗試 sudo ./script)
231+1 records in
231+1 records out
115904 bytes transferred in 0.021222 secs (5461534 bytes/sec)
0+0 records in
0+0 records out
0 bytes transferred in 0.000014 secs (0 bytes/sec)

5. Xcode Organizer:
   (1). 在 iPod touch 連接 Mac 情況下開啓 Xcode 4, 將 iPod touch 設成開發使用:

        a. 點擊右上角的 "Organizer".
        b. 接著, 在跳出式窗的 DEVICES 項目下, 選擇自己的 iPod touch 名稱.
        c. 按下中間的 "Using for Development" 按鈕.
        d. 接著,當要你輸入付費開發者的帳號密碼時, 按取消即可.

   (2). 此外, Xcode 的 Organizer 也可能會出現訊息: Unknown iOS detected,
        按下 Collect 即可.


訊息: Xcode does not have debugging information for the version of iOS on the device named “Lanli's iPod”. Xcode can collect debugging data from the device to enable development with this version of iOS. This process only needs to be done once per iOS version, and will take several minutes.

說明: 後來我移除 Xcode 後, 並在終端機下移除了 iOS 4.2.1 (8C148) 的相關資料:
         cd /Developer/Platforms/iPhoneOS.platform/DeviceSupport
         sudo rm -rf 4.2.1\ \(8C148\)/

         再重裝 Xcode 時, 接上 iPod touch 後, 就會再出現
Unknown iOS detected
         的訊息, 這時若是按下
"Cancel", Build 時就會出現訊息:
         Xcode cannot run using the selected device.
         NO provisioned iOS device are available. Connect an iOS device or
         choose a an iOS simulator as the destination.

         所以還是要按下 Collect 按鈕.

6. Xcode Build Settings:
   (1). 開啓/建立 一個專案 => 點二下 PROJECT 下的專案名稱
        => 切換到 Build Settings Tab(頁籤).

   (2). 檢查 / 設定 Base SDK: iOS 4.3


   (3). 檢查 / 設定 Code Signing Identity:
         Debug:
         Any iOS SDK: Don't Code Sign

         Release:
         Any iOS SDK: Don't Code Sign

   (4). 檢查 / 設定 Deployment:
         Targeted Device Family: iPhone
         iOS Deployment Targete: iOS 4.2


三. 開始測試:
    1. 設定 active scheme 為 iPod touch 的名稱:
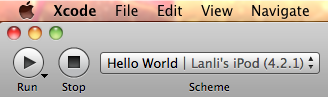
  
    2. 執行 Run:  Build 成功.

    3. app 在實機上跑是正常的, 但是會出現錯誤訊息:
       Error Starting Executable "your app name":


四. 調整 active scheme: (讓錯誤訊息不再出現)
     1. 點下 active scheme 的下拉式選單, 選擇 Edit Scheme...

2. 在跳出來的選單中, 左邊選擇 Run xxx.app, 將右邊的 Info Tab 下的 Debugger 項目,
    值由預設的 GDB 改選成 None.


2011年2月6日 星期日

iPod touch 3rd Jailbreak 4.2.1


由於 Apple 官方釋出了 Xcode 4 GM (Golden Master) 版, 搭配了 iOS SDK 4.2; 並且 iOS 4.3 也快要發表了, 所以即使這次越獄使用的 greenpois0n JB Tool 還是 beta 版, 試過後, 結果是 OK 的.

1. 先將 iPod touch 的 "自動鎖定" 功能, 設成 "永不".
   => 設定 > 一般 > 自動鎖定: 永不

2. 備份 ECID:
   a. 在 Mac OS X 下, 連結 iPod Touch 並且下載 Umbrella:
      http://thefirmwareumbrella.blogspot.com/

   b. (目前版本: 4.21.07). 安裝好 TinyUmbrella 後, 點開進入並選擇你的 iPod Touch,

   c. 接著按下右上方的 "SAVE SHSH" 按鈕.

   d. 儲存好的 SHSH 會各放一份在 CYDIA 的 server 和本機(MAc) 上的
      /Users/<your username>/.shsh
目錄下.

3. 備份 iPod touch 資料:
   a. 執行 Cydia 的 AptBackup
      (可用來備份 Cydia 安裝過的軟體清單, 但仍無法完整回復).

   b. 執行 Cydia 的 AppBackup (備份你所下載的應用程式之存檔與設定)
      (1). 備份後, 需檢查 iPod touch 上
          /private/var/mobile/Library/Preferences/AppBackup
 
          目錄下的所有檔案(含子目錄下的檔案) 日期是否為最新的.
          如果不是的話, 必須利用 sftp 登入到 iPod touch 裡, 並調整
          /private/var/mobile/Library/Preferences/AppBackup
          目錄下的 檔案與目錄權限為 777 (chmod 777 *.*),
          之後再備份一次並檢查日期.

     (2). 承上, 利用 sftp 把 iPod touch 上
         /private/var/mobile/Library/Preferences/AppBackup
         目錄下的 backuptimes.plist 還有 tarballs 資料夾備份到電腦上.

  c. 使用 iTunes 同步並備份 iPod touch 的資料.

4. Download iPod touch Firmware : (在 6.(2) 中會用到)
   http://www.felixbruns.de/iPod/firmware/
   => 在此使用的版本為: iPod touch 3G (4.2.1/8C148)

5. 將 iPod touch 進入 DFU Mode:
   a. 開啟 iTunes 並將手上的 iPod touch 連接至電腦.
   b. 強制關機.(同時按著 "電源開關鍵"[稍先] 及 "主目錄鍵" 不放)
   c. 當 iPod touch 重新啓動後, 放開 "電源開關鍵", 10 秒後, 再放開"主目錄鍵".
   d. 進入 DFU Mode 後及按回復之前, 主機將維持黑屏及不會顯示任何東西.

6. 使用 iTunes 回復 DFU Mode 的 iPod touch:
   a. Mac 電腦: 按下鍵盤 option 鍵, 並同時按下 iTunes 裏的回復按鈕.
   b. 彈出提示框後, 選取剛剛下載的 iPod touch 3G 4.2.1 官方韌體, 並等侍 iTunes 回應.

7. 回復 iPod touch 的備份資料並執行一次同步(與 Umbrella).
   說明: 由於還沒有越獄並安裝 Cydia 與相關軟體, 因此有些軟體目前
             無法安裝是正常的
.

8. 下載 GreenPosi0n:
   http://www.greenpois0n.com/
   目前 Mac 的版本為: greenpois0n RC5 beta 3
   => 解壓縮 gp_mac_rc5_b3.zip: greenpois0n.app

9. 開始越獄:
   a. 將 iPod touch 連接上 Mac, iTunes 可以關閉(結束).

   b. 打開 greenpois0n.app 按下 "Jailbreak" 按鈕, 並依照提示的步驟進行:
      (1). 倒數 5 秒準備時間.
      (2). 按住 "電源鍵" 3 秒.
      (3). 按住 "電源鍵" 不放, 再多按一個 "Home" 鍵 10 秒.  
      (4). 放掉 "電源鍵", 持續按著 "Home" 鍵直到開始執行程式.

   c. 可能會先有一次 Failed 字幕出現, 然後才會繼續跑程式.

   d. 成功後,iPod touch 桌面會出現一個 Loader 的 app, 點進去後,
      就可以下載 Cydia 了.

10. Cydia 設定:
    a. Cydia 開啟後, 選擇 Developer (No Filters).
    b. 重開 Cydia, 若有軟件更新, 將彈出提示框, 選擇 Upgrade Essential,
       再選擇 Confirm.
    c. 注意軟件更新時不要譲主機自動上鎖.
    d. 請再次開啟 Cydia, 按下 Change, 若有軟件更新, 選擇 Upgrade (), 再選擇 Confirm.

11. Cydia 安裝軟體:
    a. OpenSSH: 可在 Mac 上使用 sftp client 的軟體連入 iPod touch 系統中.

    b. AptBackup: 備份你用Cydia安裝的軟體清單.
       說明: (1). 安裝後, 可進入 Aptbackup 選擇 restore,來命令你的 Cydia 將你有
                   安裝的軟體,一一的安裝回去. (因為它檔案存放位置會隨著 iTunes
                   的備份,存回電腦.)
               (2). 其實不太建議 (1) 的做法 , 因為一來軟體可能會有新的名稱與版本;
                   二來, 有些軟體需要先新增資訊源才可安裝. 所以建議一個一個
                   安裝比較保險.


    c. AppBackup: 備份你所下載的應用程式之存檔與設定.

    d. AppSync for OS 4.0+: 讓應用程式 (.ipa / .app) 可直接透過 iTunes 安裝.
       (1). 開啟 Cydia > MANAGE > SOURCES > EDIT > ADD
       (2). 輸入 http://cydia.hackulo.us/ > 按下 Add Source 按鈕 > 若彈出提示框,
           選擇 Add Anyway 即可.
       (3). 完成 Source Update 後, 按下 Return To Cydia, 返回 Source, 再按下
           剛加入的 Sources, 選擇 AppSync for OS 4.0+ 安裝.
       (4). 安裝完成後, 請重新啟動主機.

    e. CyDelete: 可直接在桌面刪除從 Cydia 下載的軟體.

    f. USB Drive: 可當成 USB 硬碟來使用.
      (1). 新增安裝源: http://apt.dmytro.me/
      (2). 安裝 USB Drive 軟體.

    g. afc2add: 可讓應用軟體( iPhone Explorer / DiskAid )瀏覽到 iPod touch 的根目錄.

12. 更改 iPod touch 的 root 密碼:
    a. 確定已用 Cydia 安裝了 OpenSSH.

    b. 共享 Mac Book Pro 的網路給 iPod touch:
       => Mac OS X > 系統偏好設定 > 共享 > Internet 共享
          (都設定好時要勾選, 此時 Mac 本身可能無法上網)
          > 共享來源: 乙太網路; 對使用以下傳輸埠的電腦: AirPort

    c. iPod touch > 設定 > Wi-Fi > 選擇網路: SnowLeopard (同時查看 IP, ex: 10.0.2.2)

    d. Mac OS X > 終端機 > ssh root@10.0.2.2 (default password: alpine)
       => 如果出現以下訊息:
           WARNING: REMOTE HOST IDENTIFICATION HAS CHANGED!
          (代表, 之前有 jailbreak 過不同的版本並曾登入過 iPod touch,)
          解決辦法: 先移除(這裡用搬移檔案) Mac 上 .ssh 目錄下的檔案, 再登入一次:
          $ cd /Users/lanli/.ssh
          $ mv known_hosts known_hosts_back_20110206

    e. 承上, 鍵入 passwd 來輸入新密碼.
    f. 亦可在 Mac 上使用 sftp client 的軟體連入 iPod touch 系統中.

13. 檢查 AppBackup 儲存的目錄:
    a. 登入 iPod touch 後, 到 AppBackup 目錄下, 檢查其下的檔案與子目錄下的
       檔案日期是否為最新的.
       $ cd /private/var/mobile/Library/Preferences/AppBackup
       $ ls -al

    b. 如果不是的話, 先執行 AppBackup (按下左下角的 ALL => Backup),
       讓他產生該有的檔案.
       (1). 承上, 調整目錄與檔案的權限.
            $ chmod 777 *.* (在 AppBackup 目錄下 )

       (2). 承上, 並將之前 3. 備份 iPod touch 資料: b. 執行 Cydia 的 AppBackup
           所備份的資料, 利用 sftp 傳回 iPod touch 上(覆蓋舊檔).

       (3). 承上, 然後在 AppBackup 軟體裡 按左下角的 ALL => Restore.

14. 使用 iTunes 同步並備份 iPod touch 的資料:
     => 主要是用來同步之前安裝了 JB 後才可安裝的軟體 ^^.

15. 如果想幫 iBook 增加 "英漢字典" 功能的話, 請參考:
      幫 iBooks 增加 英漢字典的文章.

2011年1月27日 星期四

幫 iBooks 增加 英漢字典


update: 2011/02/18

參考資料:
1. ibook的翻译功能
   http://bbs.weiphone.com/read-htm-tid-971970.html

2. [分享] 讓iBook也有繁體中文字典 - 第3頁
   http://iphone4.tw/forums/showthread.php?t=87551&page=3

3. 让iBook能查英汉词典及汉语大字典
   http://bbs.weiphone.com/read-htm-tid-1029292.html

4. 傻瓜化“给iBook添加字典的方法!
   http://bbs.weiphone.com/read-htm-tid-1364300.html


在此以 iPod Touch 為例來說明 ....


一. 前置步驟:
A. 首先 iPod Touch 必須先 JB 過, 然後在可上網的環境下,
    開啓 iBooks 的任一本英文書, 並使用字典功能:
 

B. 接著就按下載. 開始下載官方提供的 三個英英字典:
 
   New Oxford American Dictionary.dictionary
   Oxford American Writer's Thesaurus.dictionary
   Apple Dictionary.dictionary
說明: 這麼作的原因, 是要在 iPod Touch 的 iBooks 相關目錄下,
         自動產生存放字典檔的 Dictionaries 目錄.

二. 下載英漢字典檔:
     A. 懶蟲簡明英漢詞典.dictionary.rar
     B. 朗道英漢字典.dictionary.rar
     C. 21世紀英漢漢英雙向詞典.dictionary.rar
    
     來源: http://iphone4.tw/forums/showthread.php?t=87551&page=3
     說明: Mac 內建的字典格式跟 iBooks 字典檔的格式是相同的,
             所以也可以使用 Mac 上的字典檔.


三. 在 Mac 上利用 DiskAid 來查找 iBooks.app 資料夾與 Dictionaries 資料夾.
     A. 尋找 /var/mobile/Applications/xxxx 目錄下, 含有 iBooks.app 的資料夾:
         結果 => xxxx 為: 535B5987-7EA1-4D6B-A6BA-5658D0993D8D

        iBooks.app 的資料夾:
        /var/mobile/Applications/535B5987-7EA1-4D6B-A6BA-5658D0993D8D/iBooks.app

     B. 在此 xxxx 目錄下的 Library  目錄內即有 Dictionaries 資料夾.

        Dictionaries 資料夾:
        /var/mobile/Applications/535B5987-7EA1-4D6B-A6BA-5658D0993D8D/Library/Dictionaries
     

四. 調整: 字典管理順序設定檔
     A. 順序設定檔位置:
        /var/mobile/Applications/535B5987-7EA1-4D6B-A6BA-5658D0993D8D/iBooks.app/
        檔名: BKDictionaryManager_LanguageToOrder.plist

     B. 下載(sftp)後, 在此 .plist 內, 可以找到以下這段:
        <dict>
            <key>en</key>
            <array>
                <string>com.apple.dictionary.NOAD</string>
                <string>com.apple.dictionary.OAWT</string>
                <string>com.apple.dictionary.AppleDictionary</string>
            </array>
        ........
        <dict>

        說明: 1. <key>en</key> 代表: 當遇到英文(en)時,
                  會依序(由上而下)查找以下的字典,
                  當有找到時, 就不會再找下一個字典, 亦即:
                  查詢的結果只會出現最先找到的字典那一個結果.

                2. <string> .... <string>, 這三組字串是先前下載的英英字典的 ID 值:
                   New Oxford American Dictionary.dictionary
                   Oxford American Writer's Thesaurus.dictionary
                   Apple Dictionary.dictionary
                                  
     C. 先假設我們要查找的英漢字典的先後順序, 並定好 ID 值:
        1. 懶蟲簡明英漢詞典
           英文檔名: Lazy Worm English-Chinese Dictionary
                     ID: com.apple.dictionary.LWECD

        2. 朗道英漢字典
           英文檔名: Langdao Englih-Chinese Dictionary
                     ID: com.apple.dictionary.LECD          

        3. 21世紀英漢漢英雙向詞典
           英文檔名: 21 century bidirectional dictionary
                     ID: com.apple.dictionary.21CBD

     D. 則 BKDictionaryManager_LanguageToOrder.plist 調整如下:

        <dict>
            <key>en</key>
            <array>
                <string>com.apple.dictionary.LWECD</string>
                <string>com.apple.dictionary.LECD</string>
                <string>com.apple.dictionary.21CBD</string>
                <string>com.apple.dictionary.NOAD</string>
                <string>com.apple.dictionary.OAWT</string>
                <string>com.apple.dictionary.AppleDictionary</string>
            </array>
        ........
        <dict>

     E. 如此一來, 當字典檔都處理好時, 查詢 iBooks 內的英文時就會
        依以下的字典順序
來查找:

        1. 懶蟲簡明英漢詞典
        2. 朗道英漢字典
        3. 21世紀英漢漢英雙向詞典
        4. New Oxford American Dictionary
        5. Oxford American Writer's Thesaurus
        6. Apple Dictionary

     F. 存檔並回傳(sftp), 調整檔案權限.(ssh 登入)
        cd /var/mobile/Applications/535B5987-7EA1-4D6B-A6BA-5658D0993D8D/iBooks.app

        chown mobile:mobile BKDictionaryManager_LanguageToOrder.plist


五. 處理: 英漢字典檔
     A. 懶蟲簡明英漢詞典
         1. 解壓縮: 懶蟲簡明英漢詞典.dictionary.rar , 進入 Contents 目錄,
            打開 Info.plist 找到並調整以下設定:

    <key>CFBundleDisplayName</key>
    <string>懶蟲簡明英漢詞典</string>   
    <string>Lazy Worm English-Chinese Dictionary</string> // 檔名
   
    <key>CFBundleIdentifier</key>
    <string>com.apple.dictionary.懶蟲簡明英漢詞典</string>
    <string>com.apple.dictionary.LWECD</string> 
    // ID => Lazy Worm English-Chinese Dictionary 縮寫

   
    <key>CFBundleName</key>
    <string>懶蟲簡明英漢詞典</string>  // 字典標題? (預設未改, 尚無作用)

         2. 新增資料夾名稱: Lazy Worm English-Chinese Dictionary

         3. 將 Contents 目錄放進來, 資料夾改名為:
            Lazy Worm English-Chinese Dictionary.dictionary


         4. 上傳到 /var/mobile/Applications/535B5987-7EA1-4D6B-A6BA-5658D0993D8D/Library/Dictionaries 下.


     B. 朗道英漢字典
         1. 解壓縮: 朗道英漢字典.dictionary.rar , 進入 Contents 目錄,
            打開 Info.plist 找到並調整以下設定:

    <key>CFBundleDisplayName</key>
    <string>朗道英漢字典</string>
    <string>Langdao Englih-Chinese Dictionary</string> // 檔名
   
    <key>CFBundleIdentifier</key>
    <string>com.apple.dictionary.朗道英漢字典</string>
    <string>com.apple.dictionary.LECD</string>
    // ID => Langdao Englih-Chinese Dictionary 縮寫

  
    <key>CFBundleName</key>
    <string>朗道英漢字典</string> // 字典標題? (預設未改, 尚無作用)

         2. 新增資料夾名稱: Langdao Englih-Chinese Dictionary

         3. 將 Contents 目錄放進來, 資料夾改名為:
            Langdao Englih-Chinese Dictionary.dictionary

         4. 上傳到 /var/mobile/Applications/535B5987-7EA1-4D6B-A6BA-5658D0993D8D/Library/Dictionaries 下.


     C. 21世紀英漢漢英雙向詞典
         1. 解壓縮: 21世紀英漢漢英雙向詞典.dictionary.rar , 進入 Contents 目錄,
            打開 Info.plist 找到並調整以下設定:

    <key>CFBundleDisplayName</key>
    <string>21世紀英漢漢英雙向詞典</string>
    <string>21 century bidirectional dictionary</string> // 檔名
   
    <key>CFBundleIdentifier</key>
    <string>com.apple.dictionary.21世紀英漢漢英雙向詞典</string>  
    <string>com.apple.dictionary.21CBD</string> 
    // ID => 21 century bidirectional dictionary 縮寫
      
    <key>CFBundleName</key>
    <string>21世紀英漢漢英雙向詞典</string> // 字典標題? (預設未改, 尚無作用)

         2. 新增資料夾名稱: 21 century bidirectional dictionary

         3. 將 Contents 目錄放進來, 資料夾改名為:
            21 century bidirectional dictionary.dictionary

         4. 上傳到 /var/mobile/Applications/535B5987-7EA1-4D6B-A6BA-5658D0993D8D/Library/Dictionaries 下.


     D. 調整權限: (ssh)
        cd /var/mobile/Applications/535B5987-7EA1-4D6B-A6BA-5658D0993D8D/Library/Dictionaries

        chmod 775 *.*
        chown mobile:mobile *.*


     E. 將 iPod Touch 重新開機.


六. 備註:
        A. 當 iBooks 版本有升級時, 只需要將調整好的 BKDictionaryManager_LanguageToOrder.plist
           檔案重新上傳(或先刪除原檔), 然後調整權限即可.

        B. 如果 JB iOS 4.2.1 後, 無法正常開啓 iBook 新下載的 .epub 電子書, 解決方式:
           1. 在 Cydia 增加資源 (Add Source): http://repo.insanelyi.com
           2. 搜尋並安裝 iBooks Fix
           3. 重新啟動主機

2011年1月12日 星期三

PSX Emulator for the iPhone/iPod Touch


update: 2011/01/28

在 iPhone 上玩 PS 模擬器:

由於在 Cydia 上無法成功安裝 Psx4All, 出現訊息: cydia.zodttd.com Host Unreachable;
即使把 "cydia.zodttd.com" 加入 Sources, 也無法安裝, 因此以下改成用手動安裝.

參考來源:
1. [iPhone][Cydia] 如何安裝 deb 包裝的 App
   http://blog.lauct.org/archives/1499

2. psx4all | Apple iPhone School
   http://www.appleiphoneschool.com/psx4all/

3. [O] Psx4All 4.0.10 [Repo] Sony Playstation emulator! New and improved! 
   http://xsellize.com/topic/103541-o-psx4all-4010-repo/


A. 在 Cydia 上搜尋 & 安裝: BTstack 套件.
=> 不然之後的手動安裝會失敗並出現以下訊息:

   com.zodttd.psx4all depends on ch.ringwald.btstack; however:
   Package ch.ringwald.btstack is not installed.

   com.zodttd.psx4all depends on unzip; however:
   Package unzip is not installed.

   com.zodttd.psx4all depends on unrar; however:
   Package unrar is not installed.

   p.s. 只要安裝 BTstack 就可以了, unzip 與 unrar 就會自動安裝好.


B. 下載相關檔案到 Mac 上:
   (1). Cydia 的 .deb 安裝檔案: Psx4All v4.0.10
       (此版本支援: PSP formatted PSX EBOOT.PBP file)
       => com.zodttd.psx4all_4.0.10_iphoneos-arm.deb (962.26 KB)
           http://www.multiupload.com/AI083WOAP9

   (2). BIOS file: scph1001.bin
       => http://www.veggie.it...sx/scph1001.zip

   (3). diablo 遊戲檔 (使用: PS 轉 PSP 的 .PBP 檔也可以, 但是比較不順)
       => diablo.bin : http://www.megaupload.com/?d=PVOY3Y88


C. 共享 Mac 的網路給 iPhone: (確定已用 Cydia 安裝了 OpenSSH)
   => Mac OS X > 系統偏好設定 > 共享 > Internet 共享
      (都設定好時要勾選, 此時 Mac 本身可能無法上網)
      > 共享來源: 乙太網路; 對使用以下傳輸埠的電腦: AirPort

   => iPod Touch > 設定 > Wi-Fi > 選擇網路: SnowLeopard (同時查看 IP, ex: 10.0.2.2)

   => Mac OS X > 終端機 > ssh root@10.0.2.2 (enter password: xxxx)


D. 安裝 deb 包裝的 App:
   (1). 利用 sftp 上傳 Psx4All v4.0.10 的 deb 檔案到 iPhone 的以下目錄內:
       /var/mobile/Media/ 然後用 ssh 登入 iPhone 並執行以下安裝步驟:
       cd /var/mobile/Media/
       dpkg -i com.zodttd.psx4all_4.0.10_iphoneos-arm.deb

  
(2). 將 iPhone 重新開機, 即安裝完成.(桌面會出現 PlayStation 的AP圖示, 如下示)


p.s. 我是將所有要上傳的檔案都傳好, 並放好位置後才重新開機.
       但是 Transmit (sftp) 需要斷線重連, 才會出現更新的目錄.


E. 上傳 BIOS 檔:
   利用 sftp 上傳 scph1001.bin 檔案到 iPhone 的以下目錄內:
   /var/mobile/Media/ROMs/PSX/ 然後用 ssh 登入 iPhone 並調整權限:

   cd /var/mobile/Media/ROMs/PSX/
   chmod 755 scph1001.bin


F. 上傳遊戲檔:
   利用 sftp 上傳 diablo.bin 檔案到 iPhone 的以下目錄內:
   /var/root/Media/ROMs/PSX 然後用 ssh 登入 iPhone 並調整權限:
  
   cd /var/mobile/Media/ROMs/PSX/
   chmod 755 diablo.bin

G. 備註:
1. 我在 iPod Touch 3rd generation 上, 跑得不是很順暢, 遊戲畫面也太小了,
   有時還會有輕微的爆音, 希望以後有機會可以在 iPad 上試試.

2. 遊戲的簡易圖示說明:

(1).
按下桌面 PlayStation 的AP圖示後, 會出現以下的主選單,
    最下方有 4個 Tab; 最左邊的 Browse 可以瀏覽到你上傳的遊戲,
    通常用來玩新遊戲時會點選.


(2).  Recent Tab 記錄著最近執行過的檔名.


(3). Saves Tab 存放著, 經過執行 "Save [Currently Loaded]" 或
    "Save State To New File" 產生的檔案, 可以用來快速載入遊戲,
    不過較佔儲存空間.


  用 ssh 登入 iPod Touch 後, 可以在 /var/mobile/Media/ROMs/PSX/ ,
  看到產生的檔案.


(4). Options Tab 提供遊戲額外的設定, 其中的 Autosave 應該就是讓 user
     選擇是否要自動存檔, 預設為: 否.


(5). 一開始執行遊戲時, 需要選擇畫面的方向(直的或橫的),
     以及有無聲音.


直向的遊戲: (建議使用, 如下所示)
優點: 操作界面與遊戲界面分開, 不會相互干擾到.
缺點: 遊戲畫面較小.


橫向的遊戲: (如下所示)
優點: 遊戲畫面較大.
缺點: 操作界面與遊戲界面重疊, 會相互干擾到.
        (特別是在做設定時, 如存檔)


(6). press start to continue:
    a. start 鍵是在 X 鍵的左下角那個突起的小圓點.
    b. 它左邊的小圓點應該是 select 鍵.
    c. 最左下角的返回圖示, 可以作 Save [Currently Loaded],
       Save State To New File 或 Quit To Menu.


(7). 按下 start 後的選單.


(8). 進入 options > controller setup 看看遊戲操作方式:
    攻擊: X
    動作: 方塊
    施展魔法: 三角
    裝備魔法: O
    開啓魔法書: L2
    自動地圖切換: R2
    快速補血: L1
    快速補法: R1


(9). 按 三角(back), 回上個選單, 選擇 new game;
    目前好像只能選擇單人玩.


(10). 選戰士.


(11). 命名:


(12). 難度: 一般


(13). 進入遊戲, 此時:
      a. X 鍵 左下角為 paused
      b. paused 鍵左邊為 select

(14). 按 select 鍵進入:


(15). 選擇: game speed, 可將遊戲速度調快.


(16). 存檔功能


(17). 進入地下層


(18). This is diablo .... 這就是 戴艾波


2010年11月18日 星期四

iPhone 開發筆記18: cocos2d MultipleTouch

A. 新增 cocos2d Application Project: boardGame5

B. HelloWorldScene.h
// When you import this file, you import all the cocos2d classes
#import "cocos2d.h"

// HelloWorld Layer                 //@add
@interface HelloWorld : CCLayer <CCTargetedTouchDelegate>

// returns a Scene that contains the HelloWorld as the only child
+(id) scene;

@end

-----------------------------------------------------------------------------------------------

C. boardGame5AppDelegate.m

- (void) applicationDidFinishLaunching:(UIApplication*)application
{
    CC_DIRECTOR_INIT();
   
    //@add
    // Init the window
    window = [[UIWindow alloc] initWithFrame:[[UIScreen mainScreen] bounds]];
   
    //@add
    [window setUserInteractionEnabled:YES]; 
    [window setMultipleTouchEnabled:YES];
    ....
}

-----------------------------------------------------------------------------------------------

D. HelloWorldScene.m

// on "init" you need to initialize your instance
-(id) init
{
    // always call "super" init
    // Apple recommends to re-assign "self" with the "super" return value
    if( (self=[super init] )) {
       
        //@add
        self.isTouchEnabled = YES;  
        // @add
        [[CCTouchDispatcher sharedDispatcher]
         addTargetedDelegate:self priority:0 swallowsTouches:YES];
    ....
    }
    return self;
}


// @add
-(BOOL) ccTouchBegan:(UITouch*)touch withEvent:(UIEvent*)event
{   
    CGPoint touchLocation=[touch locationInView:[touch view]];
    touchLocation=[[CCDirector sharedDirector] convertToGL:touchLocation];
    CGPoint nodePosition = [self convertToNodeSpace: touchLocation];
   
    int t_x = nodePosition.x;
    int t_y = nodePosition.y;    

    ....
   
    return YES;
}

2010年11月17日 星期三

iPhone 開發筆記17: cocos2d 圖片動畫效果

A. 新增 cocos2d Application Project.

B. 在 HelloWorldScene.m:
-(id) init
{
    // always call "super" init
    // Apple recommends to re-assign "self" with the "super" return value
    if( (self=[super init] )) {
        ....
        // 從左上角往右下角切割圖檔
        //CCSprite *sprite = [CCSprite spriteWithFile:@"Icon.png" rect:CGRectMake(20, 20, 57, 57)];

        CCSprite *sprite = [CCSprite spriteWithFile:@"Icon.png"]; // source size
        sprite.position = ccp(240, 50);
   
        /* 動畫效果: case01 -> normal */
        id action =
        // (1). CCJumpTo: 跳躍至絕對座標
        // [CCJumpTo actionWithDuration:2 position:ccp(300,0) height:50 jumps:4]; // -> 300, 0

        // (2). CCJumpBy: 跳躍至相對座標(以原始座標累加距離的跳躍)
        // [CCJumpBy actionWithDuration:2 position:ccp(300,0) height:50 jumps:4]; // -> 540, 50

        // (3). CCRotateTo: 旋轉
        // [CCRotateTo actionWithDuration:2 angle:180];
       
        // (4). 淡入
        // [CCFadeIn actionWithDuration:2];
       
        // (5). 淡出
        // [CCFadeOut actionWithDuration:2];
       
        // (6). 移至絕對座標
        // [CCMoveTo actionWithDuration:2 position: ccp(100, 100)];
       
        // (7). 移至相對座標
        // [CCMoveBy actionWithDuration:2 position: ccp(100, 100)]; // 340, 150

        // 混合動作
        // (8). CCSequence: one by one (連續動作)
        [CCSequence actions:
        // [CCRotateTo actionWithDuration:2 angle:180], // ---> error with reverse happend?
        [CCRotateBy actionWithDuration:2 angle:180],
        [CCJumpBy actionWithDuration:2 position:ccp(300,0) height:50 jumps:4],
        [CCFadeOut actionWithDuration:2],
        [CCCallFunc actionWithTarget:self selector:@selector(callback1)],
        nil];

        // 混合動作
        // (9). CCSpawn: do it the sametime (同時動作)
        /*
         [CCSpawn actions:
         [CCRotateTo actionWithDuration:2 angle:180], // ---> error with reverse happend?
         [CCRotateBy actionWithDuration:2 angle:180],
         [CCJumpBy actionWithDuration:2 position:ccp(300,0) height:50 jumps:4],
         [CCFadeOut actionWithDuration:2],
         [CCCallFunc actionWithTarget:self selector:@selector(callback1)],
         nil];
         */

        /* 動畫效果: case02 -> repeat */
        // (10). CCRepeatForever: 無限重複執行
        // CCRepeatForever *repeat = [CCRepeatForever actionWithAction:action];
       
        // (11). CCRepeat: 重複執行
        // CCRepeat *repeat = [CCRepeat actionWithAction:action times:2];

       
/* 動畫效果: case03 -> reverse */
        // (12). reverse: 反向執行
        // id t_reverse = [CCSequence actions:action, [action reverse], nil];

        // runAction
        // case 1: for normal
        [sprite runAction:action];
       
        // case 2: for repeat
        // [sprite runAction:repeat];
       
        // case 3: for reverse
        // [sprite runAction:t_reverse];

        [self addChild: sprite];
    }
    return self;
}


- (void) callback1
{
    CCLabel *labelEnd = [CCLabel labelWithString:@"Game Over" fontName:@"Marker Felt" fontSize:64];
   
    CGSize size = [[CCDirector sharedDirector] winSize];
   
    // position the label on the center of the screen
    labelEnd.position = ccp( size.width /2 , size.height/2 - 100 );
   
    [self addChild: labelEnd];
}

iPhone 開發筆記16: cocos2d 安裝與移除

A. cocos2d 官網: http://www.cocos2d-iphone.org/

B. 下載穩定版本(Stable version): http://www.cocos2d-iphone.org/download

C. 安裝方式:
   1. 解壓縮下載的檔案: cocos2d-iphone-0.99.4.tar.gz
   2. 在 Terminal 下, 到解壓縮目錄內執行:
      $ cd cocos2d-iphone-0.99.4
      $ sudo ./install-templates.sh
   3. 可以看到以下的安裝訊息:
      Installing cocos2d template:
      /Library/Application Support/Developer/Shared/Xcode/Project Templates/cocos2d 0.99.4/cocos2d Application/

      Installing cocos2d + box2d template:
      /Library/Application Support/Developer/Shared/Xcode/Project Templates/cocos2d 0.99.4/cocos2d Box2d Application/

      Installing cocos2d + chipmunk template:
      /Library/Application Support/Developer/Shared/Xcode/Project Templates/cocos2d 0.99.4/cocos2d Chipmunk Application/

      creating destination directory:
      /Library/Application Support/Developer/Shared/Xcode/File Templates/cocos2d 0.99.4/

D. 移除方式:
   刪除: C 安裝後所產生的目錄即可.