2013年9月7日 星期六

Using OpenCV on iOS

since: 2013/09/07
update: 2013/09/07

reference:
1. OpenCV iOS Hello — OpenCV 2.4.6.0 documentation
2. CVPR 2012: OpenCV for iOS
3. 在xcode中应用opencv开发iphone应用程序 - Belial计算机视觉的专栏
4. ios - dismissModalViewControllerAnimated deprecated - Stack Overflow

A. 建置環境:
     OS: Mac OS X 10.8.4
     Xcode: 4.6.3
     OpenCV: 2.4.6
     iOS: 6.1.4
---------------------------------------------------------------------------------

B. 建立 Xcode 專案:
     1. Xcode > File > New > Project...
         iOS > Application > Single View Application
         > Next

     2. Choose options for your new project:
         Product Name: HelloOpenCV
         Checked: Use Storyboards, Use Autumatic Reference Couting
         > Next > Create

---------------------------------------------------------------------------------

C. Link OpenCV framework with Xcode:
     1. 到  OpenCV 官網, 下載: OpenCV for iOS
         目前版本為: 2.4.6, 檔名為: opencv2.framework.zip
         > 解壓縮後得到: opencv2.framework 資料夾.

     2. Project(HelloOpenCV) > Build Phases > Link Binary With Libraries
         > + > Add Other... > 選取剛剛的 opencv2.framework 資料夾 >
         > Open

     3. 結果如下:

     4. 修改預編譯標頭檔(precompiled header):
         > 開啓 HelloOpenCV-Prefix.pch 檔案, 修改如下:
#import <Availability.h>

#ifndef __IPHONE_5_0
#warning "This project uses features only available in iOS SDK 5.0 and later."
#endif


//@add for OpenCV
#ifdef __cplusplus
#import <opencv2/opencv.hpp>
#endif


#ifdef __OBJC__
    #import <UIKit/UIKit.h>
    #import <Foundation/Foundation.h>
#endif


備註: 在專案中有使用到 OpenCV 的地方, 需要將對應的 .m 檔案改成 .mm 檔案,
          以支援 C++.


---------------------------------------------------------------------------------

D. 設計 UI 與程式連結:
      1. 點選左邊 MainStoryboard.storyboard 檔案,
          從右方的物件函式庫將 ImageViewToolbar 拖拉到 view 物件上.

      2. 在點選 UI 的情況下, 點選右上方的 Assistant Editor:
           > a. 點選 UI 上的 ImageView, 按住 control 鍵, 拖拉到右方的 ViewController.h
                  類別內, 放開後, 在跳出的視窗內設定以下的值:

                  Connection: Outlet
                  Name: imageView
                  > Connect

           > b. 點選 UI 上的 BarButtonItem, 按住 control 鍵, 拖拉到右方的 ViewController.h
                  類別內, 放開後, 在跳出的視窗內設定以下的值:

                  Connection: Outlet
                  Name: loadButton
                  > Connect

           > c. 點選 UI 上的 BarButtonItem, 按住 control 鍵, 拖拉到右方的 ViewController.h
                  類別內, 放開後, 在跳出的視窗內設定以下的值:

                  Connection: Action
                  Name: loadButtonPressed
                  > Connect

      3. 完成後, ViewController.h 的程式碼如下:
#import <UIKit/UIKit.h>

@interface ViewController : UIViewController


//@add
@property (weak, nonatomic) IBOutlet UIImageView *imageView;
@property (weak, nonatomic) IBOutlet UIBarButtonItem *loadButton;


//@add
- (IBAction)loadButtonPressed:(id)sender;

@end

      4. 修改 ViewController.m 的程式碼如下:
....
@implementation ViewController


//@add
@synthesize imageView;
@synthesize loadButton;

....

---------------------------------------------------------------------------------

E. 設定 UIImagePickerController 的委任:
     1. 開啓 ViewController.h 檔案, 修改如下:
#import <UIKit/UIKit.h>

//@interface ViewController : UIViewController
//@add for UIImagePickerController delegate
@interface ViewController : UIViewController <UIImagePickerControllerDelegate, UINavigationControllerDelegate>

//@add
@property (weak, nonatomic) IBOutlet UIImageView *imageView;
@property (weak, nonatomic) IBOutlet UIBarButtonItem *loadButton;

//@add
- (IBAction)loadButtonPressed:(id)sender;

@end


     2. 開啓 ViewController.m 檔案, 修改如下:
....
@implementation ViewController
....

//@add for UIImagePickerController delegate
- (void)imagePickerController:(UIImagePickerController *)picker didFinishPickingMediaWithInfo:(NSDictionary *)info
{
}


//@add for UIImagePickerController delegate

- (void)imagePickerControllerDidCancel:(UIImagePickerController *)picker
{
}


@end


---------------------------------------------------------------------------------

F. 建立讓 OpenCV 的 cv::Mat 與 iOS 的 UIImage 互相轉換的函式:
     1. 修改 ViewController.h 檔案如下:
....
//@add
- (IBAction)loadButtonPressed:(id)sender;

//@add
// convert cv::Mat to UIImage

static UIImage* MattoUIImage(const cv::Mat& m);
// convert UIImage to cv::Mat
static void UIImagetoMat(const UIImage* image, cv::Mat& m);

     2. 先將 ViewController.m 的檔名改成 ViewController.mm 以支援 C++.

     3. 修改 ViewController.mm 檔案如下: (在 #import 下方, 最前面)
#import "ViewController.h"

//@add for OpenCV
// convert cv::Mat to UIImage

static UIImage* MattoUIImage(const cv::Mat& m)
{
    //CV_ASSERT(m.depth() == CV_8U);
    if (m.depth() != CV_8U)
        return nil;
   
    NSData* data = [NSData dataWithBytes:m.data length:m.elemSize()*m.total()];
    CGColorSpaceRef colorSpace = m.channels() ==1 ? CGColorSpaceCreateDeviceGray():CGColorSpaceCreateDeviceRGB();
    CGDataProviderRef provider = CGDataProviderCreateWithCFData((__bridge CFDataRef)data);
   
    // Creating CGImage from cv::Mat
    CGImageRef imageRef = CGImageCreate(m.cols, m.rows, m.elemSize1()*8, m.elemSize()*8, m.step[0], colorSpace, kCGImageAlphaNoneSkipLast|kCGBitmapByteOrderDefault, provider, NULL, false, kCGRenderingIntentDefault);
   
    UIImage* finalImage = [UIImage imageWithCGImage:imageRef];
    CGImageRelease(imageRef);
    CGDataProviderRelease(provider);
    CGColorSpaceRelease(colorSpace);
   
    return  finalImage;
}


//@add for OpenCV
// convert UIImage to cv::Mat

static void UIImagetoMat(const UIImage* image, cv::Mat& m)
{
    CGColorSpaceRef colorSpace = CGImageGetColorSpace(image.CGImage);
    CGFloat cols = image.size.width;
    CGFloat rows = image.size.height;
    m.create(rows, cols, CV_8UC4); // 8 bits per component, 4 channels
   
    CGContextRef contextRef = CGBitmapContextCreate(m.data, cols, rows, 8, m.step[0], colorSpace, kCGImageAlphaNoneSkipLast|kCGBitmapByteOrderDefault);
   
    CGContextDrawImage(contextRef, CGRectMake(0, 0, cols, rows), image.CGImage);
   
    CGContextRelease(contextRef);
    //CGColorSpaceRelease(colorSpace);
}

....

---------------------------------------------------------------------------------

G. 建立用來使用 OpenCV 的函式:
      1. 開啓 ViewController.h 檔案, 修改如下:
....
//@add
// convert cv::Mat to UIImage
static UIImage* MattoUIImage(const cv::Mat& m);
// convert UIImage to cv::Mat
static void UIImagetoMat(const UIImage* image, cv::Mat& m);


//@add for process With OpenCV
- (void)processWithOpenCV:(UIImage*)image;


@end

      2. 開啓 ViewController.mm 檔案, 修改如下:
....
//@add for process With OpenCV
- (void)processWithOpenCV:(UIImage*)image
{
    if (image == nil)
        return;
   
    // imageView.image = image;
    cv::Mat m, gray;
    UIImagetoMat(image, m);
   
    cv::cvtColor(m, gray, CV_BGR2GRAY);
    cv::GaussianBlur(gray, gray, cv::Size(5,5), 1.2,1.2);
    cv::Canny(gray, gray, 0, 50);
    m = cv::Scalar::all(255);
    m.setTo(cv::Scalar(0, 128, 255, 255), gray);
    imageView.contentMode = UIViewContentModeScaleAspectFit;
    imageView.image = MattoUIImage(m);
}


@end

---------------------------------------------------------------------------------

H. 挑選圖片, 利用 OpenCV 處理後, 顯示出來:
      1. 開啓 ViewController.mm 檔案, 修改如下:
....
- (void)viewDidLoad
{
    [super viewDidLoad];
    // Do any additional setup after loading the view, typically from a nib.
   
    //@add for OpenCV

    NSString* filename = [[NSBundle mainBundle] pathForResource:@"HelloOpenCV" ofType:@"png"];
    UIImage* image = [UIImage imageWithContentsOfFile:filename];
    if (image != nil)
    {
        // process With OpenCV
        [self processWithOpenCV:image];
    }

}
....


- (IBAction)loadButtonPressed:(id)sender {
    //@add
    UIImagePickerController* picker = [[UIImagePickerController alloc] init];
    picker.delegate = self;
   
    if (![UIImagePickerController isSourceTypeAvailable:UIImagePickerControllerSourceTypePhotoLibrary])
        return;
   
    picker.sourceType = UIImagePickerControllerSourceTypePhotoLibrary;

   
    //@for iOS 6 after(include)
    if ([self respondsToSelector:@selector(presentViewController:animated:completion:)]) {
        [self presentViewController:picker animated:YES completion:nil];
    } else {

       
        //@for iOS 5 before
        // 'presentModalViewController:animated:' is deprecated: first deprecated in iOS 6.0
        #pragma clang diagnostic push
        #pragma clang diagnostic ignored "-Wdeprecated-declarations"
        [self presentModalViewController:picker animated:YES];
        #pragma clang diagnostic pop
    }

}

//@add for UIImagePickerController delegate
- (void)imagePickerController:(UIImagePickerController *)picker didFinishPickingMediaWithInfo:(NSDictionary *)info
{
    //@add
    [picker dismissViewControllerAnimated:YES completion:nil];
    UIImage* image = [info objectForKey:@"UIImagePickerControllerOriginalImage"];

   
    if (image != nil)
    {

        // process With OpenCV
        [self processWithOpenCV:image];
    }

}

//@add for UIImagePickerController delegate
- (void)imagePickerControllerDidCancel:(UIImagePickerController *)picker
{
    //@add
    [picker dismissViewControllerAnimated:YES completion:nil];
}
....

      2. 編譯並執行:
          原始圖檔:

          處理之後:

2013年9月5日 星期四

Using OpenCV on Mac OS X

since: 2013/09/05
update: 2013/12/15

reference:
1. Using OpenCV 2 with OS X – Hello World | Bert Balcaen
2. Homebrew — MacPorts driving you to drink? Try Homebrew!
3. Troubleshooting · mxcl/homebrew Wiki · GitHub

A. 建置環境:
     OS: Mac OS X 10.9
     Xcode: 5.0.2
     OpenCV: 2.4.6

---------------------------------------------------------------------------------

B. 更新 Java:
     (先安裝 JDK: Java SE Downloads)
     系統偏好設定
> Java > 更新

---------------------------------------------------------------------------------

C. 更新 / 安裝 Command Line Tools for Xcode:
     Xcode > Preferences... > Downloads > Components >
     Command Line Tools > Install

   如果沒有找到, 就自行下載: (update: 2013/12/15)
    > Downloads for Apple Developers
    > Categories > Developer Tools >
       command_line_tools_os_x_mavericks_for_xcode__late_october_2013.dmg
---------------------------------------------------------------------------------

D. 安裝 Homebrew package manager:

    打開終端機, 執行以下指令:(一整行)
  //ruby -e "$(curl -fsSL https://raw.github.com/mxcl/homebrew/go)"

    
     (update: 2013/12/15)
       ruby -e "$(curl -fsSL https://raw.github.com/mxcl/homebrew/go/install)"

     > 按 "ENTER" 繼續 ....
   

    > 好了之後, 安裝任何軟體前, 先執行:
       brew doctor
       (說明: brew help)

---------------------------------------------------------------------------------

E. 安裝 python:
     1. 檢查是否有安裝 python, 如果沒有的話就安裝.
         python -V

     2. 安裝 python: (即使已經有 python 了, 還是建議安裝 homebrew 的 python) 
         brew install python

         (update: 2013/12/15)
         => Setuptools and Pip have been installed. To update them
         pip install --upgrade setuptools
         pip install --upgrade pip
         (update: 2013/12/15)
         => To symlink "Idle" and the "Python Launcher" to ~/Applications
         brew linkapps

---------------------------------------------------------------------------------

F. 安裝 OpenCV:

     1. 終端機: brew tap homebrew/science

     2. 終端機: brew install opencv

(update: 2013/12/15)
錯誤訊息:
opencv: Unsatisfied dependency: numpy
Brewed Python cannot `import numpy`. Install with:
  pip-2.7 install numpy
Error: An unsatisfied requirement failed this build.


=>  pip-2.7 install numpy
=> brew install opencv
     3. 如果有錯誤訊息的話, 執行: brew doctor
         並參考: Troubleshooting · mxcl/homebrew Wiki · GitHub 的說明.
         (相關指令: brew update, brew doctor, brew --config)
---------------------------------------------------------------------------------

G. 建立 Xcode 專案:

     1. Xcode > File > New > Project...
         OS X > Application > Command Line Tool

     2. Choose options for your project:
         Product Name: HelloWorld
         Type: C++
          > Next


     3. 幫專案新增一個叫作 OpenCV 的群組: 
         > 在此群組內, 新增檔案:

         > 先打: / (反斜線), 然後就可以輸入: /usr/local/lib > Go
         > 接著分別選取以下的檔案:
            libopencv_core.dylib
            libopencv_highgui.dylib

         > 並記得勾選: Copy items .... (但原作者說: 不要勾選)
                    及勾選: Add to targets   
         > Add   

        結果如下所示:

         備註: 這是最基本的. 依照使用 OpenCV 不同的功能, 你可能需要其它的檔案.
                   舉例來說, 如果你要作
特徵檢測(
feature detection), 你會需要:
                   
libopencv_features2d.dylib 檔案.

     4. 告訴 Xcode 哪裡可以找到 OpenCV 的標頭檔:
         > 專案 > Build Settings > Search Paths > Header Search Paths :
         > 新增: /usr/local/include

     5. 更改編譯器使用的標準 C++ 函式庫: 
          > 專案 > Build Settings > Apple LLVM compiler 4.2 - Language
          > C++ Standard Library: libstdc++ (GNU C++ standard library)
          (update: 2013/12/15)
          > libc++(LLVM C++ standard library with C++11 support) 預設的


---------------------------------------------------------------------------------

H. 撰寫 OpenCV 程式:
      1. 開啟 main.cpp 檔案, 修改如下:
#include <iostream>
//@add for OpenCV
#include <opencv2/opencv.hpp>

int main(int argc, const char * argv[])
{

    // insert code here...
    /*
    std::cout << "Hello, World!\n";
    return 0;
    */
   
    //@add for OpenCV
    // load an image
    // make sure you change the path!
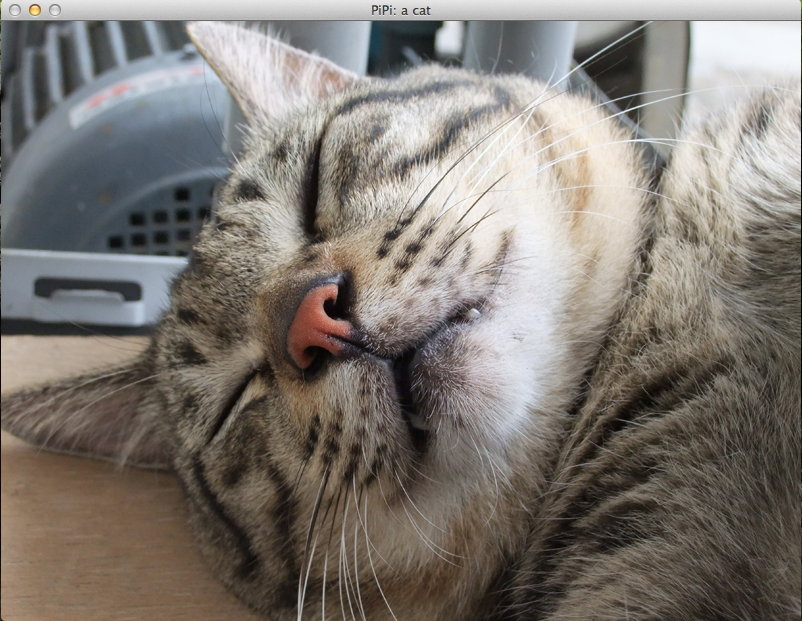
    cv::Mat img = cv::imread("/Lanli/RD/Projects/OpenCV_Mac/HelloWorld/pipi.png");
   
    // check if image was loaded
    if (img.data) {
        std::cout << "Image loaded" << std::endl;
    } else {
        std::cout << "Image not loaded" << std::endl;
    }

   
    // create a window and show the image
    cv::imshow("PiPi: a cat", img);
   
    // wait for a key press
    cv::waitKey();
}


      2. 編譯並執行: (按任意鍵結束程式)

2013年8月29日 星期四

Rendering 3D Anaglyph in OpenGL - 6

since: 2013/08/26
update: 2013/08/29

reference:
0. 原文: Rendering 3D Anaglyph in OpenGL
1. I touchs: Rendering 3D Anaglyph in OpenGL - 1
2. I touchs: Rendering 3D Anaglyph in OpenGL - 2
3. I touchs: Rendering 3D Anaglyph in OpenGL - 3
4. I touchs: Rendering 3D Anaglyph in OpenGL - 4
5. I touchs: Rendering 3D Anaglyph in OpenGL - 5

I.
Mac OS X 實作

    1. 新增專案:
        Xcode > File > New > Project... > OS X > Application >
        Command Line Tool > Next

       Product Name: 3DAnaglyph       
       Company Identifier: com.blogspot
       Type: C++
       Use Automatic Reference Counting: checked
       > Next > Create

    2. 新增 Framework:
       OpenGL
        - OpenGL is the premier environment for developing portable,
           interactive 2D and 3D graphics applications.

       GLUT
        - OpenGL Utility Toolkit

    3. 新增檔案:
        a. 立體攝影機類別:
            Xcode > File > New > File...
            > OS X > C and C++ > C++ Class > Next


              Save As: StereoCamera.cpp
              Targets: 3DAnaglyph (勾選)
              > Create

        b. 繪圖函式:
            Xcode > File > New > File...
            > OS X > C and C++ > C++ Class > Next


              Save As: draw.cpp
              Targets: 3DAnaglyph (勾選)
              > Create

    4. 整個專案檔案架構如下:

    5. 新增: 立體攝影機
        a. 開啓 StereoCamera.h 檔案, 修改如下:
#ifndef ___DAnaglyph__StereoCamera__
#define ___DAnaglyph__StereoCamera__

#include <iostream>

//@add
#include <OpenGL/OpenGL.h> // OpenGL Library
#include <GLUT/GLUT.h> // OpenGL Utility Toolkit
#include <math.h>


#endif /* defined(___DAnaglyph__StereoCamera__) */

        b. 開啓 StereoCamera.cpp 檔案, 修改如下:
#include "StereoCamera.h"

//@add
class StereoCamera
{
public:
   
    // 建構子
    StereoCamera(
                 float Convergence, // 收斂距離
                 float EyeSeparation, // 二眼間隔
                 float AspectRatio, // 寬高比
                 float FOV, // 視野角度
                 float NearClippingDistance, // 近截距
                 float FarClippingDistance // 遠截距
                 )
    {
        mConvergence            = Convergence;
        mEyeSeparation          = EyeSeparation;
        mAspectRatio            = AspectRatio;
        //mFOV                    = FOV * PI / 180.0f;
        //@update
        mFOV                    = FOV * M_PI / 180.0f;
        mNearClippingDistance   = NearClippingDistance;
        mFarClippingDistance    = FarClippingDistance;
    }
   
    // 套用左視錐
    void ApplyLeftFrustum()
    {
        float top, bottom, left, right;
        top     = mNearClippingDistance * tan(mFOV/2);
        bottom  = -top;
        float a = mAspectRatio * tan(mFOV/2) * mConvergence;
        float b = a - mEyeSeparation/2;
        float c = a + mEyeSeparation/2;
        left    = -b * mNearClippingDistance/mConvergence;
        right   =  c * mNearClippingDistance/mConvergence;
       
        // 設置投影矩陣 (會後做)
        glMatrixMode(GL_PROJECTION);
        glLoadIdentity();
        glFrustum(left, right, bottom, top, mNearClippingDistance, mFarClippingDistance);
       
        // 設置 模型/視野 矩陣 (會先做)
        glMatrixMode(GL_MODELVIEW);
        glLoadIdentity();
        // 將世界座標往右位移: 二眼間隔的一半距離
        glTranslatef(mEyeSeparation/2, 0.0f, 0.0f);
    }
   
    // 套用右視錐
    void ApplyRightFrustum()
    {
        float top, bottom, left, right;
        top     = mNearClippingDistance * tan(mFOV/2);
        bottom  = -top;
        float a = mAspectRatio * tan(mFOV/2) * mConvergence;
        float b = a - mEyeSeparation/2;
        float c = a + mEyeSeparation/2;
        left    =  -c * mNearClippingDistance/mConvergence;
        right   =   b * mNearClippingDistance/mConvergence;
       
        // 設置投影矩陣 (會後做)
        glMatrixMode(GL_PROJECTION);
        glLoadIdentity(); 
        glFrustum(left, right, bottom, top, mNearClippingDistance, mFarClippingDistance);
       
        // 設置 模型/視野 矩陣 (會先做)
        glMatrixMode(GL_MODELVIEW);                   
        glLoadIdentity(); 
        // 將世界座標往左位移: 二眼間隔的一半距離
        glTranslatef(-mEyeSeparation/2, 0.0f, 0.0f);
    }
   
    // 內部變數
private:
    float mConvergence;
    float mEyeSeparation;
    float mAspectRatio;
    float mFOV;
    float mNearClippingDistance;
    float mFarClippingDistance;
};


    6. 新增: 繪圖函式
        a. 開啓 draw.h 檔案, 修改如下:
#ifndef ___DAnaglyph__draw__
#define ___DAnaglyph__draw__

//#include <iostream>
//@add
#include "StereoCamera.cpp"

#endif /* defined(___DAnaglyph__draw__) */

//@add

void DrawGLScene();
void PlaceSceneElements();


        b. 開啓 draw.cpp 檔案, 修改如下:
//@add
// 主要的繪圖函式

void DrawGLScene()
{
    glClear(GL_COLOR_BUFFER_BIT | GL_DEPTH_BUFFER_BIT);
   
    // 設定立體攝影機系統
    StereoCamera cam(
                     2000.0f,     // Convergence (收斂距離)
                     35.0f,       // Eye Separation (二眼間隔)
                     1.3333f,     // Aspect Ratio (寬高比)
                     45.0f,       // FOV along Y in degrees (沿著 Y 軸的視野角度)
                     10.0f,       // Near Clipping Distance (近截距)
                     20000.0f);   // Far Clipping Distance (遠截距)
   
    cam.ApplyLeftFrustum();
    glColorMask(true, false, false, false); // 只將紅色寫入緩沖區(紅色遮罩)
    PlaceSceneElements(); // 在場景中放入物體
   
    glClear(GL_DEPTH_BUFFER_BIT) ;
   
    cam.ApplyRightFrustum();
    glColorMask(false, true, true, false); // 只將綠色及藍色寫入緩沖區(綠藍色遮罩)
    PlaceSceneElements(); // 在場景中放入物體
   
    glColorMask(true, true, true, true); // 恢復將所有色彩寫入緩沖區
   
    //@add: flush!
    glFlush();
   
    //@add: swap the double buffer
    glutSwapBuffers();
}

//@add
// 在場景中放入物體

void PlaceSceneElements()
{
    // 沿著負 Z 軸, 位移到適當的深度
    glTranslatef(0.0f, 0.0f, -1800.0f);
   
    // 旋囀場景以便觀看
    glRotatef(-60.0f, 1.0f, 0.0f, 0.0f);
    glRotatef(-45.0f, 0.0f, 0.0f, 1.0f);
   
    // 繪製相交的環形圓紋曲面(tori)
    glPushMatrix();
    glTranslatef(0.0f, 0.0f, 240.0f);
    glRotatef(90.0f, 1.0f, 0.0f, 0.0f);
    glColor3f(0.2, 0.2, 0.6);
    glutSolidTorus(40, 200, 20, 30);
    glColor3f(0.7f, 0.7f, 0.7f);
    glutWireTorus(40, 200, 20, 30);
    glPopMatrix();
   
    glPushMatrix();
    glTranslatef(240.0f, 0.0f, 240.0f);
    glColor3f(0.2, 0.2, 0.6);
    glutSolidTorus(40, 200, 20, 30);
    glColor3f(0.7f, 0.7f, 0.7f);
    glutWireTorus(40, 200, 20, 30);
    glPopMatrix();
}


    7. 修改主程式:
        開啓 main.cpp 檔案, 修改如下:
//#include <iostream>
//@add

#include "draw.h"

//@add: initialize OpenGL state
void init()
{
    // This determines the background color, in this case: gray
    // state: current clear color

    glClearColor(0.5, 0.5, 0.5, 1.0); // R, G, B, A
   
    // Determines which matrix to apply operations to.
    // value: GL_PROJECTION or GL_MODELVIEW

    glMatrixMode(GL_PROJECTION); // default
   
    // Loads the Identity matrix
    glLoadIdentity();
   
    // 投影(Projection)
    //
    // default: 正投影(Orthographic Projection)

}


//int main(int argc, const char * argv[])
//@update: just remove "const"
int main(int argc, char * argv[])
{
    // insert code here...
    //std::cout << "Hello, World!\n";

   
    // Init glut
    glutInit(&argc, argv);
   
    // Display mode
    int mode = GLUT_RGB | GLUT_DOUBLE | GLUT_DEPTH;
    glutInitDisplayMode(mode);
   
    // Init Window
    glutInitWindowSize(800, 600);
    glutInitWindowPosition(100, 100);
    glutCreateWindow("3D Anaglyph");
   
    // initialize: set OpenGL state
    init();
   
    // Callback Functions Registration
    glutDisplayFunc(DrawGLScene); // drawing
   
    // enter event processing loop
    glutMainLoop();
   
    // will not be executed
    return 0;
}


    8. 編譯並執行:

Rendering 3D Anaglyph in OpenGL - 5

since: 2013/08/25
update: 2013/08/29

reference:
0. 原文: Rendering 3D Anaglyph in OpenGL
1. I touchs: Rendering 3D Anaglyph in OpenGL - 1
2. I touchs: Rendering 3D Anaglyph in OpenGL - 2
3. I touchs: Rendering 3D Anaglyph in OpenGL - 3
4. I touchs: Rendering 3D Anaglyph in OpenGL - 4

H.
程式碼片斷

      1. 這裡有一個片段的程式碼, 用來展示如何將之前的方程式包裹成一個
          小類別 StereoCamera:(立體攝影機)

class StereoCamera
{
public:
    // 建構子
    StereoCamera(  
        float Convergence, // 收斂距離
        float EyeSeparation, // 二眼間隔
        float AspectRatio, // 寬高比
        float FOV, // 視野角度
        float NearClippingDistance, // 近截距
        float FarClippingDistance // 遠截距
        )
    {
        mConvergence            = Convergence;
        mEyeSeparation          = EyeSeparation;
        mAspectRatio            = AspectRatio;
        mFOV                    = FOV * PI / 180.0f;
        mNearClippingDistance   = NearClippingDistance;
        mFarClippingDistance    = FarClippingDistance;
    }

    // 套用左視錐
    void ApplyLeftFrustum()
    {
        float top, bottom, left, right;

        top     = mNearClippingDistance * tan(mFOV/2);
        bottom  = -top;

        float a = mAspectRatio * tan(mFOV/2) * mConvergence;

        float b = a - mEyeSeparation/2;
        float c = a + mEyeSeparation/2;

        left    = -b * mNearClippingDistance/mConvergence;
        right   =  c * mNearClippingDistance/mConvergence;

        // 設置投影矩陣 (會後做)
        glMatrixMode(GL_PROJECTION);
        glLoadIdentity();  
        glFrustum(left, right, bottom, top,
                  mNearClippingDistance, mFarClippingDistance);

        // 設置 模型/視野 矩陣 (會先做)      
        glMatrixMode(GL_MODELVIEW);                    
        glLoadIdentity();  
        // 將世界座標往右位移: 二眼間隔的一半距離
        glTranslatef(mEyeSeparation/2, 0.0f, 0.0f);      
    }

    // 套用右視錐
    void ApplyRightFrustum()
    {
        float top, bottom, left, right;

        top     = mNearClippingDistance * tan(mFOV/2);
        bottom  = -top;

        float a = mAspectRatio * tan(mFOV/2) * mConvergence;

        float b = a - mEyeSeparation/2;
        float c = a + mEyeSeparation/2;

        left    =  -c * mNearClippingDistance/mConvergence;
        right   =   b * mNearClippingDistance/mConvergence;

        // 設置投影矩陣 (會後做)
        glMatrixMode(GL_PROJECTION);                       
        glLoadIdentity();  
        glFrustum(left, right, bottom, top,
                  mNearClippingDistance, mFarClippingDistance);

        // 設置 模型/視野 矩陣 (會先做)
        glMatrixMode(GL_MODELVIEW);                    
        glLoadIdentity();  
        // 將世界座標往左位移: 二眼間隔的一半距離
        glTranslatef(-mEyeSeparation/2, 0.0f, 0.0f);
    }

// 內部變數
private:
    float mConvergence;
    float mEyeSeparation;
    float mAspectRatio;
    float mFOV;
    float mNearClippingDistance;
    float mFarClippingDistance;
};

      2. 程式碼精確地做到了先前我們對圖示與方程式所作的描述. 一旦你建立了
          StereoCamera
物件, 就可以呼叫 ApplyLeftFrustum() 與 ApplyRightFrustum()
          來各別設置非對稱的視錐. 請注意, 在這些方法中, 實際上會先作 模型/視野 的
          轉置(沿著 X 軸作位移), 然後接著才是作投影的轉置.(與實際的程式碼流程相反)
          這樣的作用是: 將攝影機從原點位移一段距離. 如此, 在 OpenGL 中, 攝影機本身
          沒有做任何的轉置. 我們所做的是: 使用 模型/視野 的轉置, 將世界座標相對於
          概念上的攝影機向某個方向移動.           

      3. 為了要使用上方的類別, 你可以撰寫如下的 OpenGL 繪圖函式:

// 主要的繪圖函式
void DrawGLScene(GLvoid)                                   
{
    glClear(GL_COLOR_BUFFER_BIT | GL_DEPTH_BUFFER_BIT);

    // 設定立體攝影機系統
    StereoCamera cam(
        2000.0f,     // Convergence (收斂距離)
        35.0f,       // Eye Separation (二眼間隔)
        1.3333f,     // Aspect Ratio (寬高比)
        45.0f,       // FOV along Y in degrees (沿著 Y 軸的視野角度)
        10.0f,       // Near Clipping Distance (近截距)
        20000.0f);   // Far Clipping Distance (遠截距)

    cam.ApplyLeftFrustum();
    glColorMask(true, false, false, false); // 只將紅色寫入緩沖區(紅色遮罩)

    PlaceSceneElements(); // 在場景中放入物體

    glClear(GL_DEPTH_BUFFER_BIT) ;

    cam.ApplyRightFrustum();
    glColorMask(false, true, true, false); // 只將綠色及藍色寫入緩沖區(綠藍色遮罩)

    PlaceSceneElements(); // 在場景中放入物體

    glColorMask(true, true, true, true); // 恢復將所有色彩寫入緩沖區
}

// 在場景中放入物體
void PlaceSceneElements()
{
   // 沿著負 Z 軸, 位移到適當的深度
    glTranslatef(0.0f, 0.0f, -1800.0f);

    // 旋囀場景以便觀看
    glRotatef(-60.0f, 1.0f, 0.0f, 0.0f);
    glRotatef(-45.0f, 0.0f, 0.0f, 1.0f);

    // 繪製相交的環形圓紋曲面(tori)
    glPushMatrix();
        glTranslatef(0.0f, 0.0f, 240.0f);
        glRotatef(90.0f, 1.0f, 0.0f, 0.0f);
        glColor3f(0.2, 0.2, 0.6);
        glutSolidTorus(40, 200, 20, 30);
        glColor3f(0.7f, 0.7f, 0.7f);
        glutWireTorus(40, 200, 20, 30);
    glPopMatrix();

    glPushMatrix();
        glTranslatef(240.0f, 0.0f, 240.0f);
        glColor3f(0.2, 0.2, 0.6);
        glutSolidTorus(40, 200, 20, 30);
        glColor3f(0.7f, 0.7f, 0.7f);
        glutWireTorus(40, 200, 20, 30);
    glPopMatrix();
}

      4. 一開始的繪圖函式先清除顏色與深度的緩衝區. 然後, 設置立體攝影機系統.
          套用左邊的視錐, 並告知 OpenGL 在顏色緩沖區中, 只允許有紅色的成分.
          接著, 呼叫一般的程序來繪製場景. 之後, 清除深度緩衝區, 但是保留顏色緩衝區
          (在其中只會有紅頻的值). 隨著深度緩衝區清除後, 我們啓用右邊的視錐, 並告知
          OpenGL 在顏色緩沖區中, 只允許有綠色和藍色的成分. 然後, 再一次呼叫一般的
          繪製程序. 注意, 左眼所看到的色彩場景顏色與右眼所看到的色彩場景, 在整個
         色彩空間中, 並沒有重疊到, 因此不需要明確地對顏色作混色(blending)或堆積
         (accumulation)的處理. 最後, 啓用所有色頻, 場景就會被繪製成浮雕的樣子.  
         注意到, 我們必須畫二次幾何圖形. 代表著: 畫面更新率(率 frame rate) 降為
         單一視錐的一半. 這是典型的立體繪製. 如果你想知道上面的程式碼片斷輸出的
         結果為何, 就是這樣子: 

                                              圖十: 上方程式列輸出的繪製結果

      5. 我(原作者)有留下一段影片, 是在撰寫此篇(稍微冗長)教學文章時所作的.
          這段影片使用我先前提過的相同理論與程式碼. 試著用 720p 全螢幕來觀看,
          以獲得最佳的效果:
           ▶ Rendering Stereoscopic 3D Anaglyph in OpenGL - YouTube

      6. 延伸閱讀:
          a. Paul Bourke: Information related to stereographics
          b. NVIDIA GTC 2010: Implementing Stereoscopic 3D in Your Applications

          盡情享受!